Showing posts with label yellow. Show all posts

Friday, June 27, 2014

Rainbow in the Clouds Manicure

Nail Art


   Here is a manicure I created using the new Sally Hansen Color Foil polishes.  They were perfect for this technique, which is much simpler to create than you might think!  Yes, this is the art that was originally meant to go over Raven.  But this base color was more fun - it glows in the dark!

Saturday, April 12, 2014

Sunny Layering with L'oreal & Milani

Layering Nail Art / Swatch


   Come on, sunshine!  You're here, you can do it - stay!  Please, please stay... it's so much easier to feel motivated when you're around...  Today I have a simple layering manicure that is bright and cheery!  I managed to knock out 3 untrieds, too!

Tuesday, September 10, 2013

Laquerlicious: Melon Sorbet with Watermelon Nail Art!

Nail Art / Swatch & Review

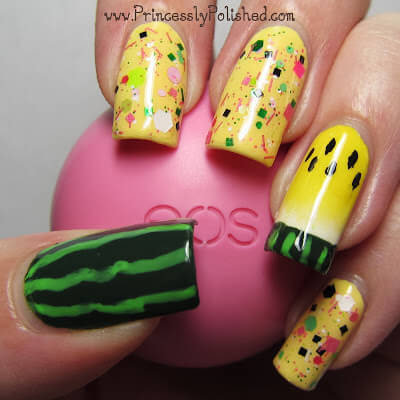
   Good day, Princesses!  Last month when my Laquerlicous polishes arrived in the mail I was immediately inspired by this one.  It was calling out to me from the bottle and I knew I needed to use it in a melon-y manicure ASAP.  I wanted to make the glitters pop, so I couldn't do just a regular pink/red watermelon design.  I thought of trying a nice cantaloupe color, but there is a funny thing about watermelon...


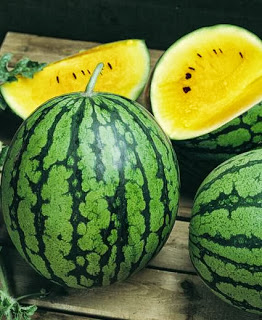
   It's a fruit, it's a vegetable.  It's not technically a melon.  And when it grows without the red pigment-giving antioxidant lycopene... it comes in the most lovely shades of yellow!

Photo source: whataboutwatermelon.com

   I must admit to feeling quite clever about remembering that yellow watermelons are indeed "a thing".  You see, I've never actually found one in person.  They just aren't common in our area.  I'd love to try a slice, though!  They sound like they taste fantastic...  Anyway, nail polish, yes.


   Laquerlicious Melon Sorbet is such a fantastic glitter topper.  I mean, just look at this macro!  It is full of satin and matte shapes in happy shades of pink and green, along with a dash of black and white.  It's the perfect blend of color variety and glitter sizes, easy to work with, and has perfect topper coverage at one coat.  Each nail ends up looking totally unique (without looking chaotic) and there is no need to do glitter fishing.  Though I did fish out the pastel pink circle for my index nail - I saw it in the bottle and I wanted it!  I could go on, but that would probably be cruel.  Right now this polish is on clearance, and there aren't many bottles left.  I'll just say that if you missed this one, I feel very sorry for you.


Details on the nail art:
   Pastel yellow glitter nails: 3 coats China Glaze Lemon Fizz and 1 coat Laquerlicious Melon Sorbet.  Topped with 1 coat of Gelous and 1 coat of Poshe.  (Only used Poshe for the other nails.)
   Melon slice accent nail: Lemon Fizz base with China Glaze Happy Go Lucky sponged at the cuticle for a riper, sweeter-looking melon, black seeds using a nail art striper (L.A. Colors Black), and Zoya Purity sponged at the tip for a realistic fade into the rind..
   Melon rinds:  Base color is Zoya Hunter with squiggly lines done with a bright green nail art striper (L.A. Colors Mint Green).

   I'm a nail-art novice, so I am really happy with how these turned out!  I actually wore these nails at the end of last month; editing the pictures now and seeing them again made me happy all over again!  It's only summer for another week, so it was a perfect time to get my melon on.  Haha.


   If you'd like to see more about yellow watermelon, check out this article on wiseGEEK and this recipe for, what else?  Yellow watermelon sorbet!  Also, if you've ever had the chance to eat yellow watermelon please leave a comment telling me about your experience!  Until I find it myself I'll have to live vicariously through others.  =)


   This might be my last blog post for a little while.  My previous OB appointment revealed that I can basically go into labor at any time (Yay!  ...I think?), and if I don't by this weekend I'll probably be induced (having issues with low fluids again, thus the constant monitoring).  In fact, as this post is going live I'm heading off to one more appointment, where I guess they could say "we're keeping you now".  But I'm hoping that doesn't happen...  Either way, I don't know that I will have much of a brain for blogging.  Most of my time off this week has been spent cleaning, packing, and napping.  ^-^  Until we see you again, hugs and kicks-es from the baby and I! ♥

Friday, September 6, 2013

Nyx Advanced Salon Formula Nail Polish - the Pastels!

Swatch & Review

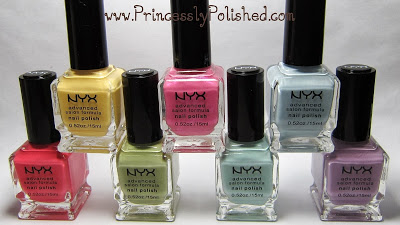
   It's no secret that I looove Nyx products.  I have a whole slew of their eyeshadows, lipglosses, and of course nail polish.  When it comes to the polish I mainly have bottles from their cheaper Nyx Girls line.  I don't often see anything about these Advanced Salon Formula polishes.  So, I've been really curious about their quality.  Finally I decided to just go for it and try all of the pastel colors.  That is, the colors that have "pastel" in their name, and happen to go in sequential numerical order...


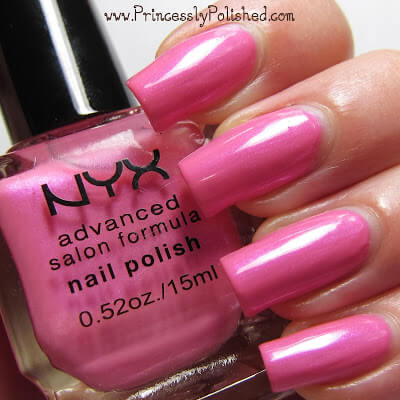
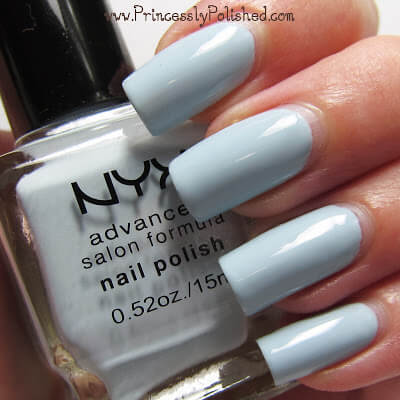
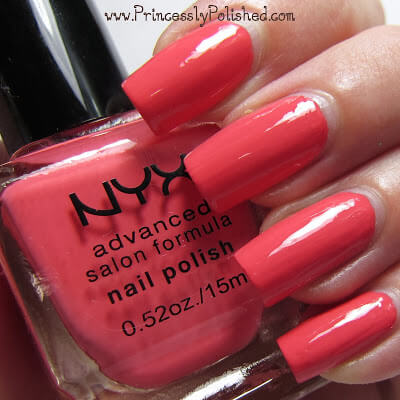
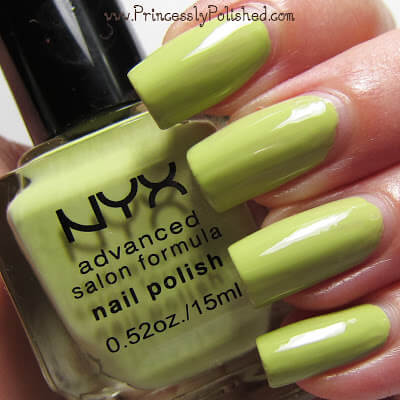
   I present to you swatches of Nyx Advanced Salon Formula: Pastel Yellow, Pastel Pink, Pastel Blue, Pastel Coral, Pastel Pistachio, Pastel Mint, and Pastel Lavender.  Let me start off by saying that I added a bit of nail polish thinner to all of the polishes because they were slightly thick, and I wanted them to be flowing a little better!  Not sure if this was because of sitting around or if these are all normally thick polishes.


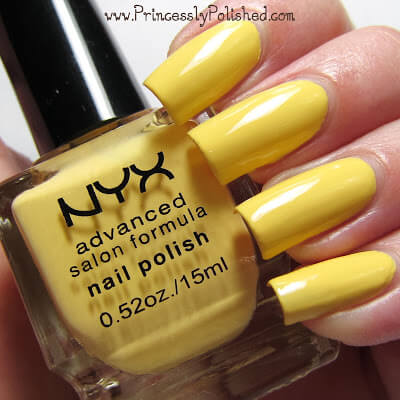
Pastel Yellow

3 coats, plus topcoat

   This buttery yellow wanted to photograph a bit more vivid than it looks in person.  I had to use 3 coats for opacity, it looked streaky otherwise.  My topcoat helped to level the color out better.  I can't fault a pastel yellow for being a 3-coater, they usually are.  The color is very nice (a bit warmer than China Glaze Lemon Fizz).


Pastel Pink

4 coats alone

   This polish stands out as the lone shimmer in this group of pastels.  I could tell from the Online swatch that it wasn't going to be a plain creme finish, and was hoping for a hidden-shimmer creme instead.  This is more of a pink jelly with ultra fine pinky-purple shimmer.  I was surprised by how much I ended up liking the shimmer and even the color (I'm picky about pink polish), but the formula leaves much to be desired.  This wasn't as thick as the other pastels, but it was super sheer.  It went on streaky, patchy, blah...  Took 3 coats to look decent and 4 for me to be happy with the effect on my nails.  Shorter nails could be okay with 3.  I'm torn about this one. The squishy jelly effect is pretty, and the shimmer is brushstroke free... but I don't have patience for 4 coats of one polish!


Pastel Blue

2 coats, plus topcoat

   This is one of the colors I was most hopeful about, and I wasn't let down.  It is the best polish out of this pastel bunch.  Despite how pale a blue it is I only needed 2 coats, and it was the most willing to self-level out of all these colors.  I added topcoat and that only made it look more perfect!  I really love this light powder blue, and I think it will be a great base color for nail art.


Pastel Coral

2 coats, plus topcoat

   I don't often go for coral, but I did want to add a not-too-bright shade to my stash for nail art.  This color fits the bill nicely.  It's a pigmented true coral without being an eye-searingly bright shade or too warm for my skin.  On the note of pigmentation, this one did want to stick to my cuticles at removal time.  It took a little more remover than the other shades did to completely rid myself of its coral tinge.  This polish was thick and didn't want to self-level, so topcoat is a must.


Pastel Pistachio

2 coats, plus topcoat

   This really is pistachio green!  While the color names aren't super creative at least they are spot-on...  The coverage was good for a light green, good at 2 and surely better with 3 coats.  It is also on the thick side and needed topcoat to level it out more.  So, not the perfect polish but fully tolerable for a shade that is usually finicky.


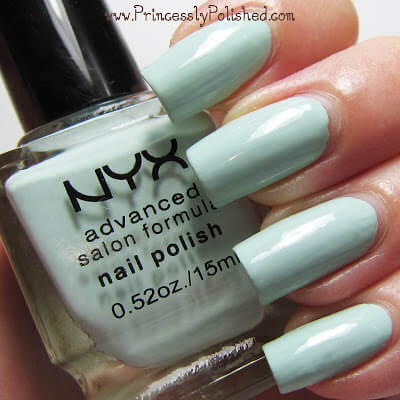
Pastel Mint

2 coats, plus topcoat

   Nyx gave us blue, green, and blue-green here!  Sitting next to Pastel Blue this definitely has a minty green cast, so it isn't too confusing.  I like the shade but can't say that is the most spectacular mint ever.  It did have good coverage, though.  It also leveled out with topcoat.


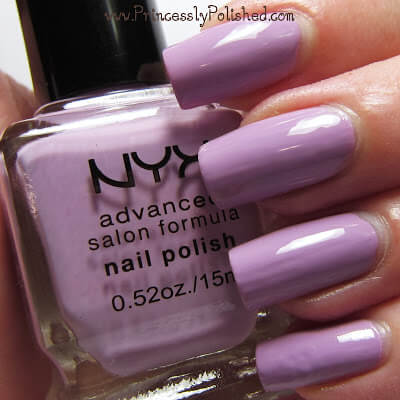
Pastel Lavender

2 coats, plus topcoat

   This is a red-toned (but not pink-y) pastel purple.  I have several lavender shades but can't think of an exact dupe for this one.  I really like the color and I think it would work for most skin tones.  Once again this polish was quite pigmented and only needed 2 coats, but needed topcoat to level it out better.


   Here is what I can say about all the polishes:  They have very low odor; I hardly noticed any polish smell at all.  They remove easily.  I love the square bottles which are sturdy and store wonderfully.  The wide, flat brushes are easy to work with.  (Pastel Pistachio and Pastel Mint each had a stray long bristle, but I didn't need to trim it before use.)  And yes, they all had to be thinned.  (Pastel Pink was the least thick of all, but it was also a shimmery jelly instead of a creme.)  Rather than be watery pastels these seem to be so loaded with pigment that they are thick and not really good at leveling themselves out.  I can't really be upset about needing topcoat with most of these when I always use it anyway, but of course I'd prefer for these to have a smoother finish.  I am most impressed by the fact that I couldn't find dupes for any of these in all the pastel polishes I already own!

   They are pastels, though, and it probably isn't good to judge an entire line by just these.  Am I inspired to buy the rest of the Advanced Salon Formula line?  No.  But I will pick a color up if I'm curious about it... and it doesn't have a dupe for half the price in the Nyx Girls line.  What do you think?  If you own any Advance Salon Formula polishes let me know which ones they are and what you think of them, thanks!

Tuesday, January 15, 2013

Nfu-Oh Jelly Syrup Sandwich Skittle Nails

NotD / Swatch & Review

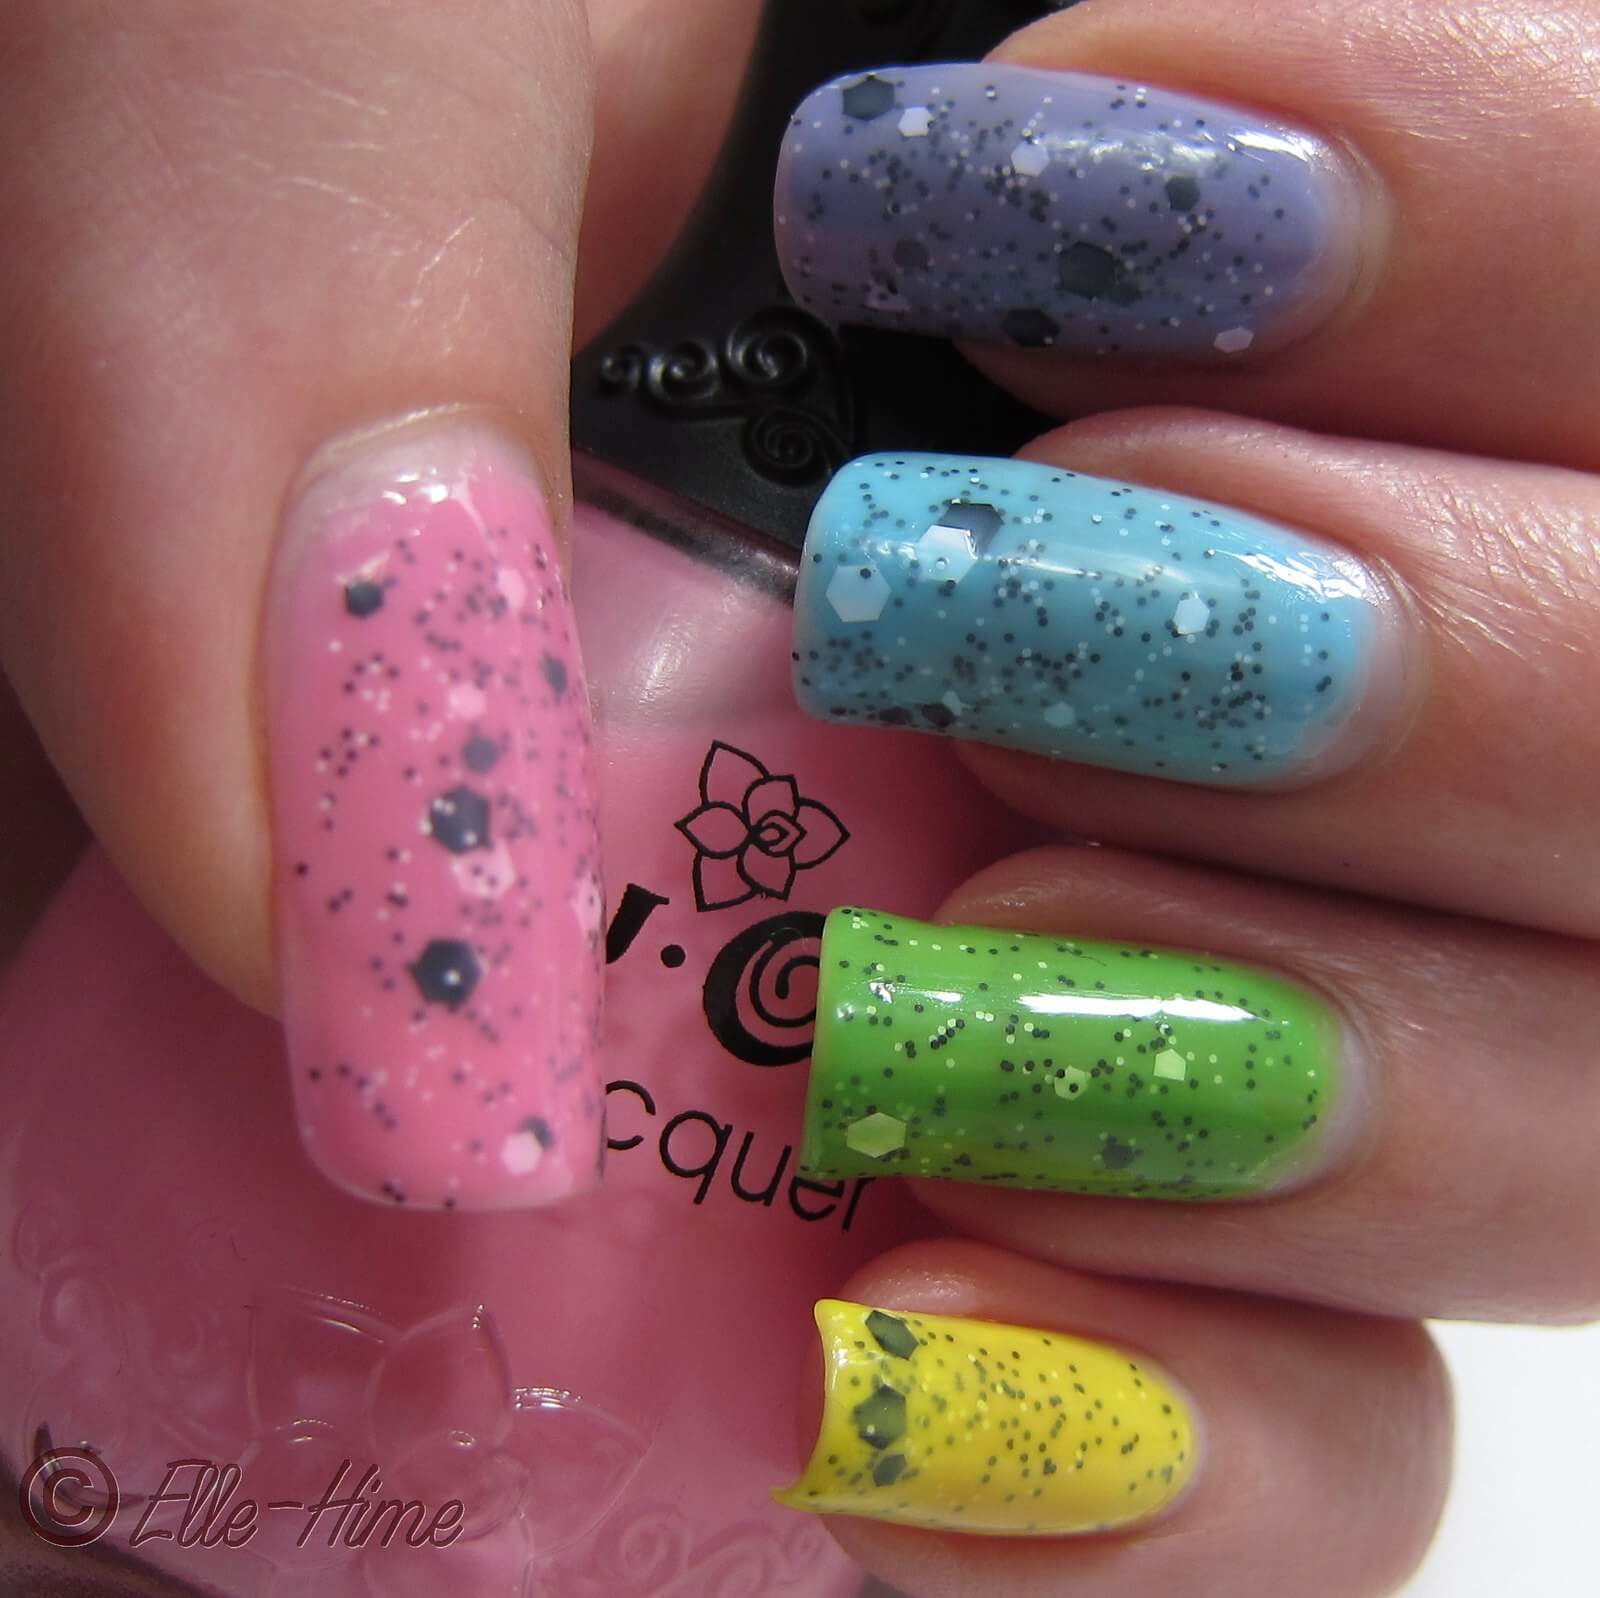
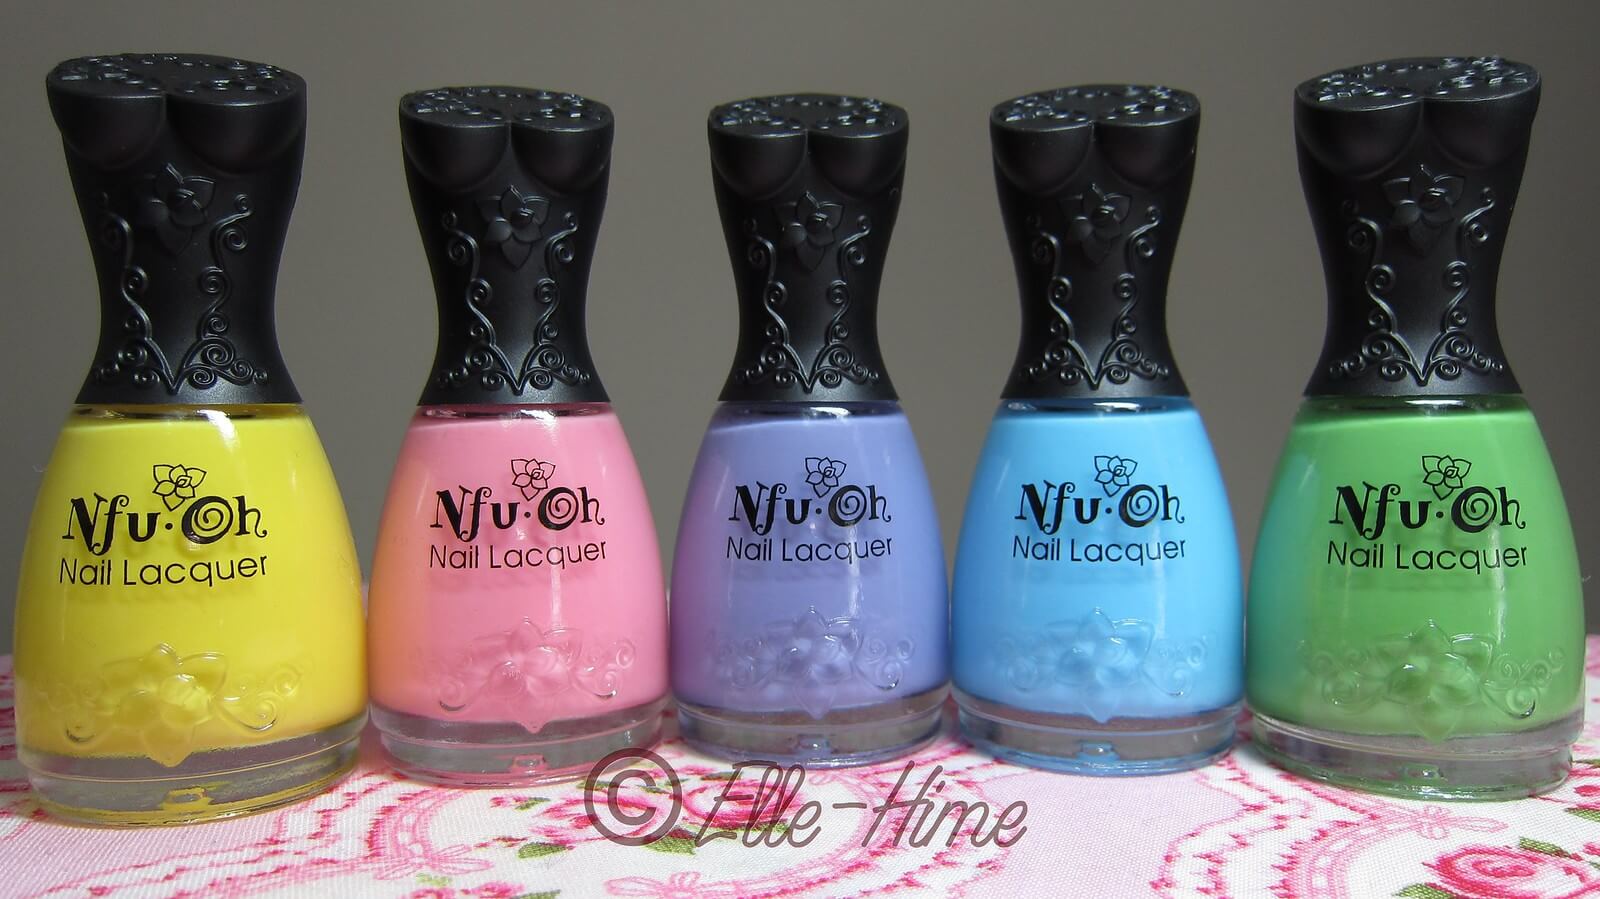
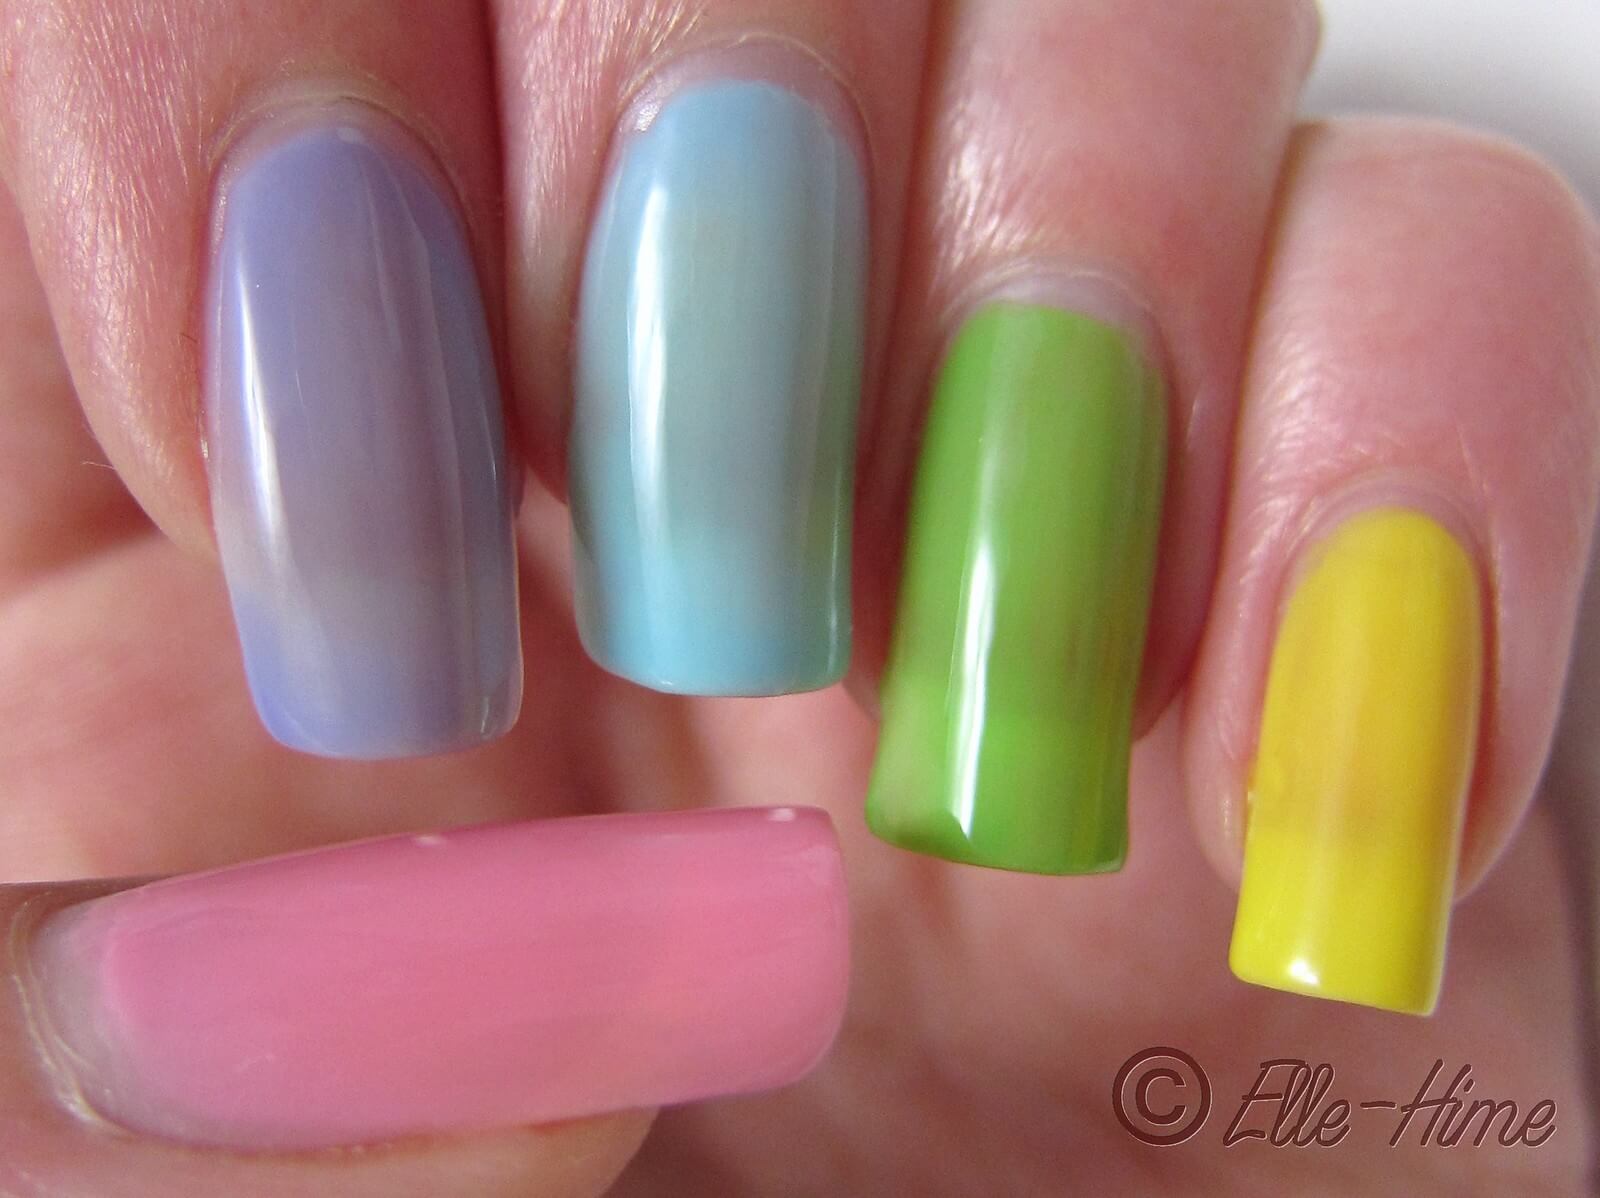
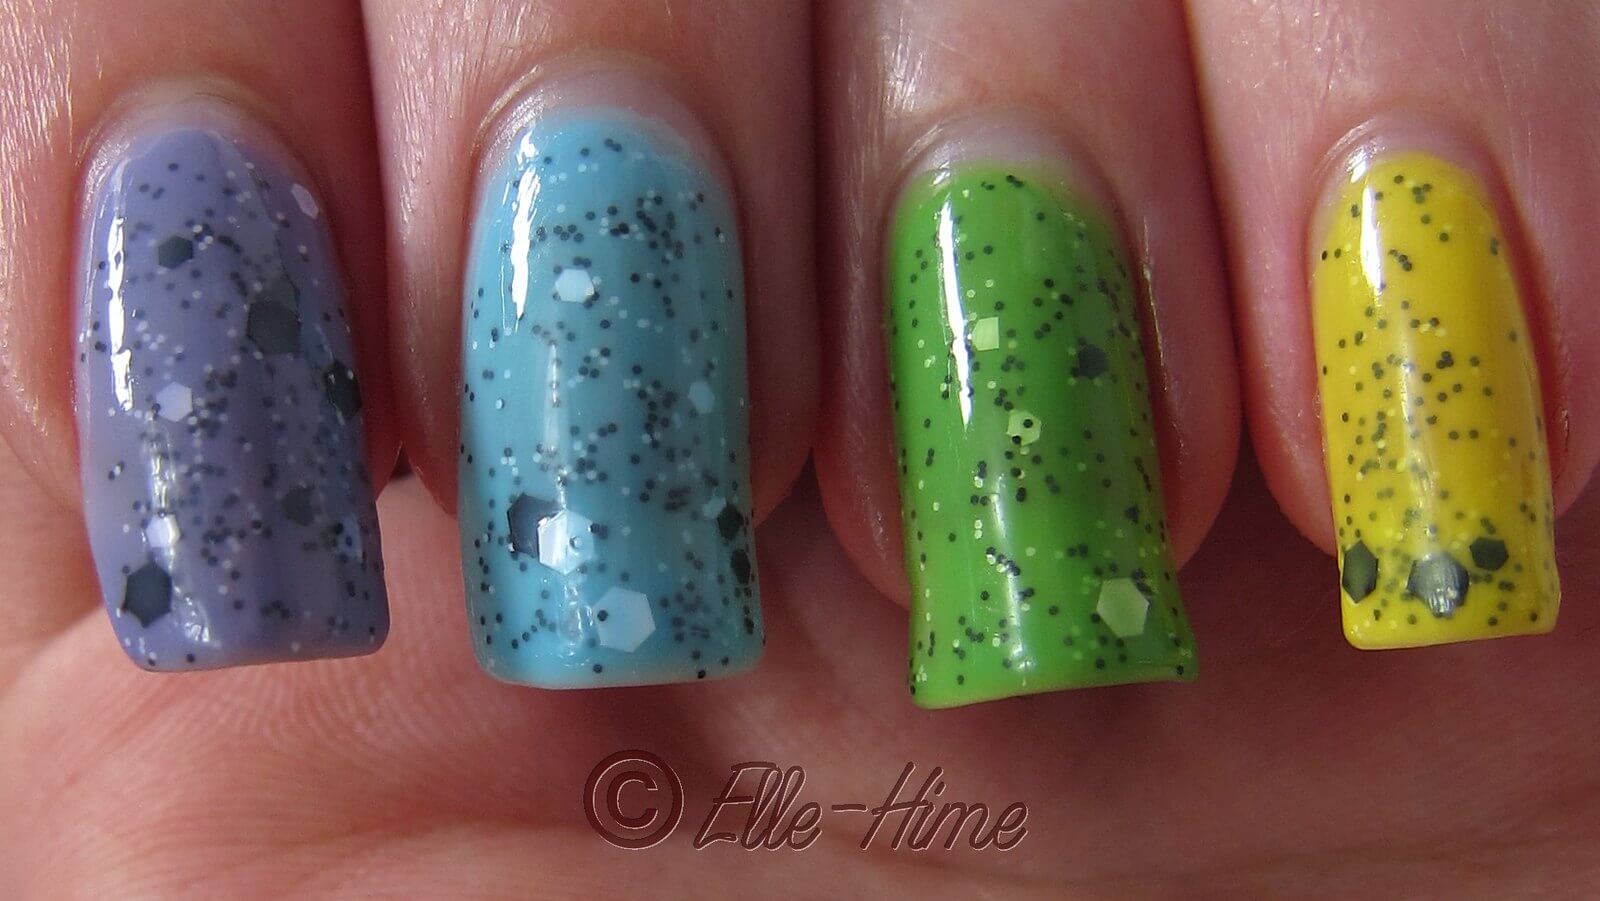
   Oops, this manicure almost got away from me!  These were my nails on January 1st, two weeks later I finally realized that I forgot to post about it!  I ordered 5 of the Jelly Syrup colors by Nfu-Oh, and figured that since I have 5 fingers on each hand I could use them all together.  And because they are jelly polishes I should do use them for jelly sandwiches!  The awesome black & white glitter Social Suicide from Different Dimension was my choice.
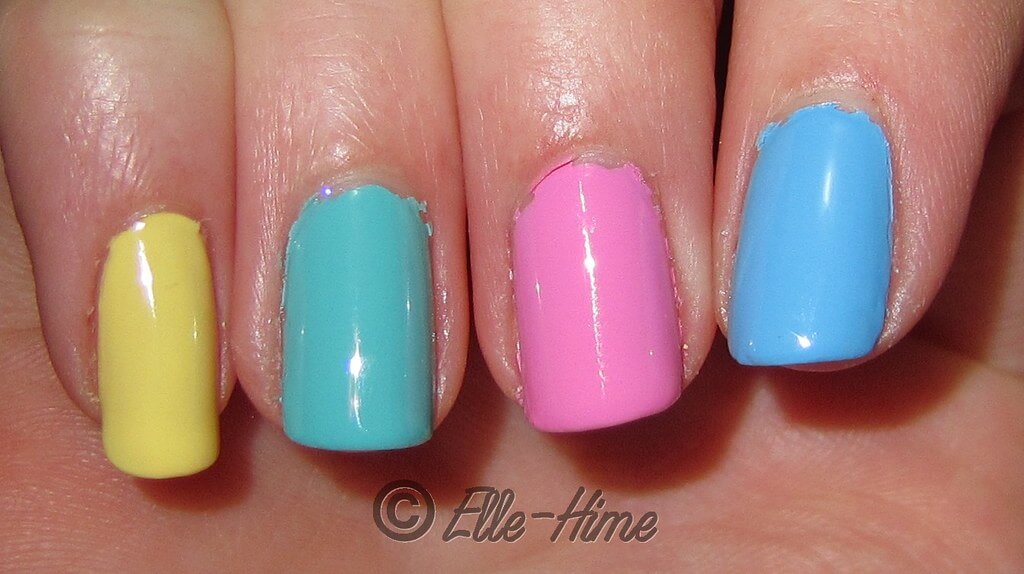

   As seen above:  The Nfu-Oh colors I used are #05: yellow; #10: true pastel pink; #13: lavender; #15: robin's egg blue; and #17: pastel green.  These are on the bright and vibrant side of pastels, but they are still pastels to me.  It was very hard to narrow it down to just these five colors to start with, but I know I'll use them a lot.


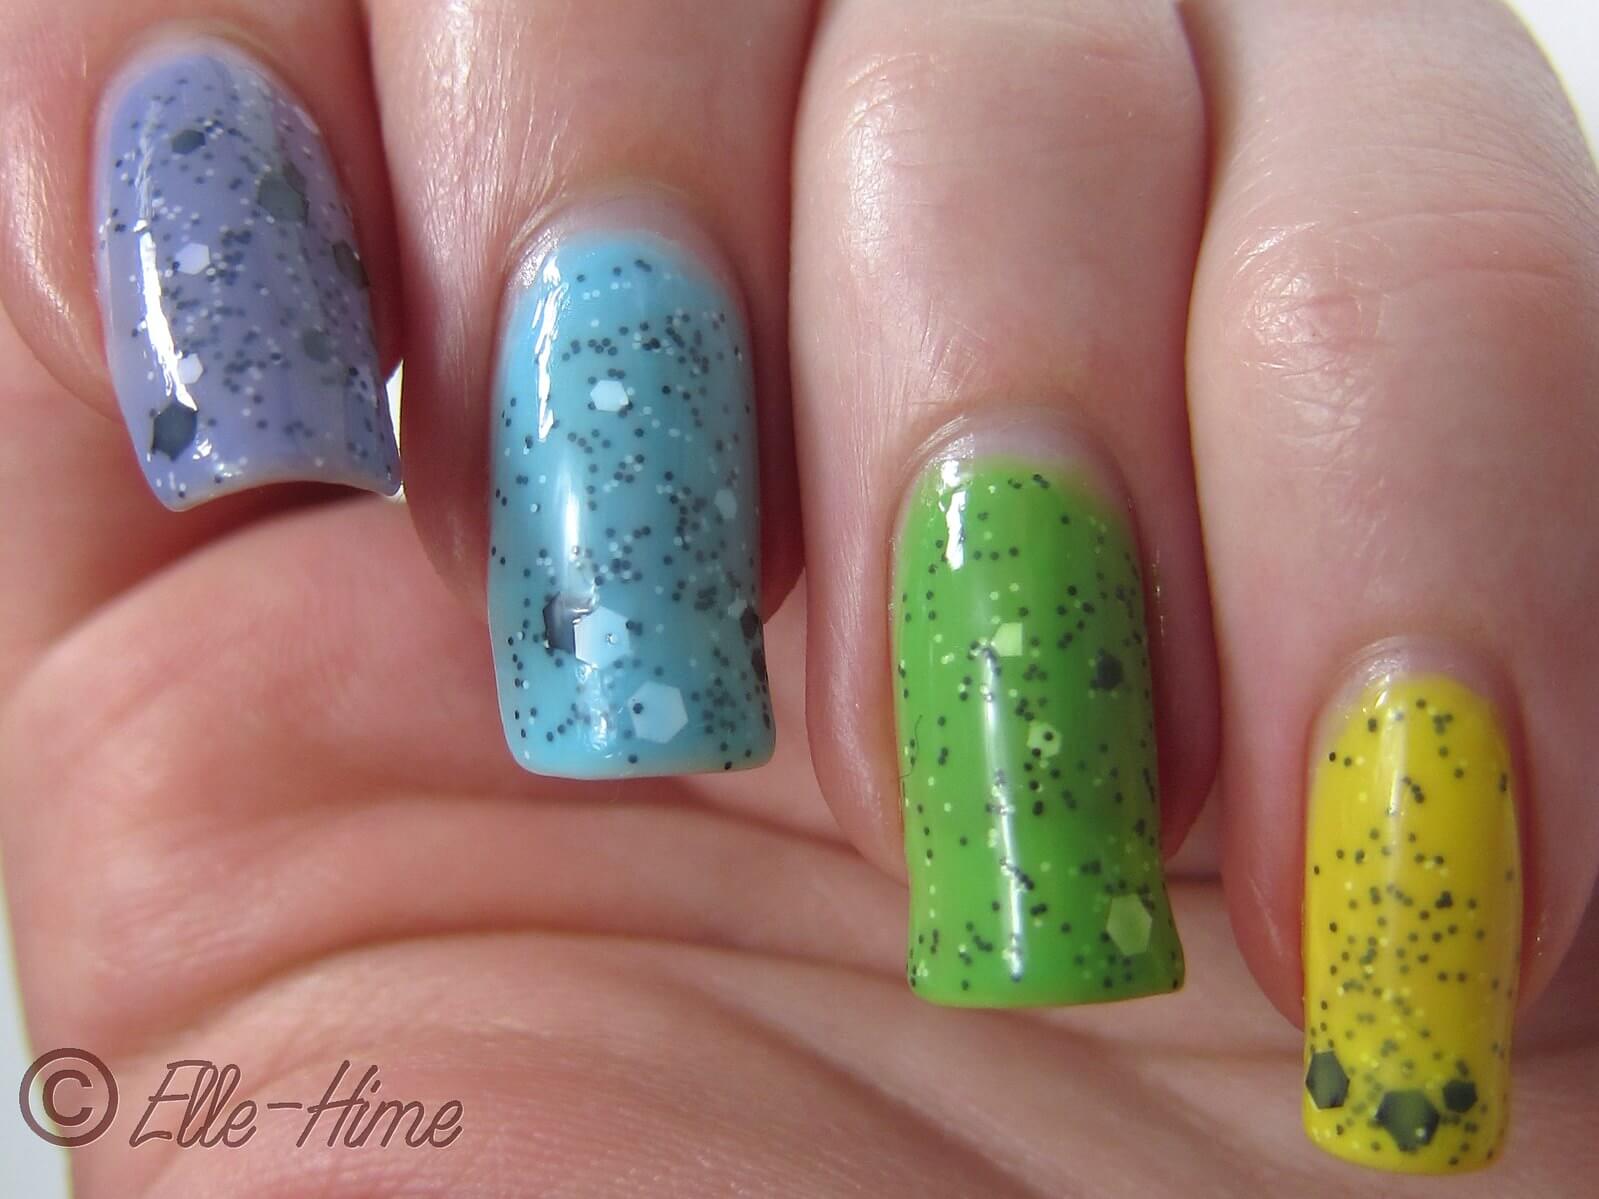
   I started my manicure with two coats of each color.  As you can see they are sheer, shiny, and squishy-looking.  The first coat tended to be a little patchy but the second coat leveled it out well.  I was careful with my brushstrokes to get a good spread of polish on each nail.  I was really impressed with the yellow, I didn't expect it to be so bright and it was more opaque than the purple.  After admiring how pretty these jellies are by themselves I put one coat of Social Suicide on each nail and covered it with the jelly color again.


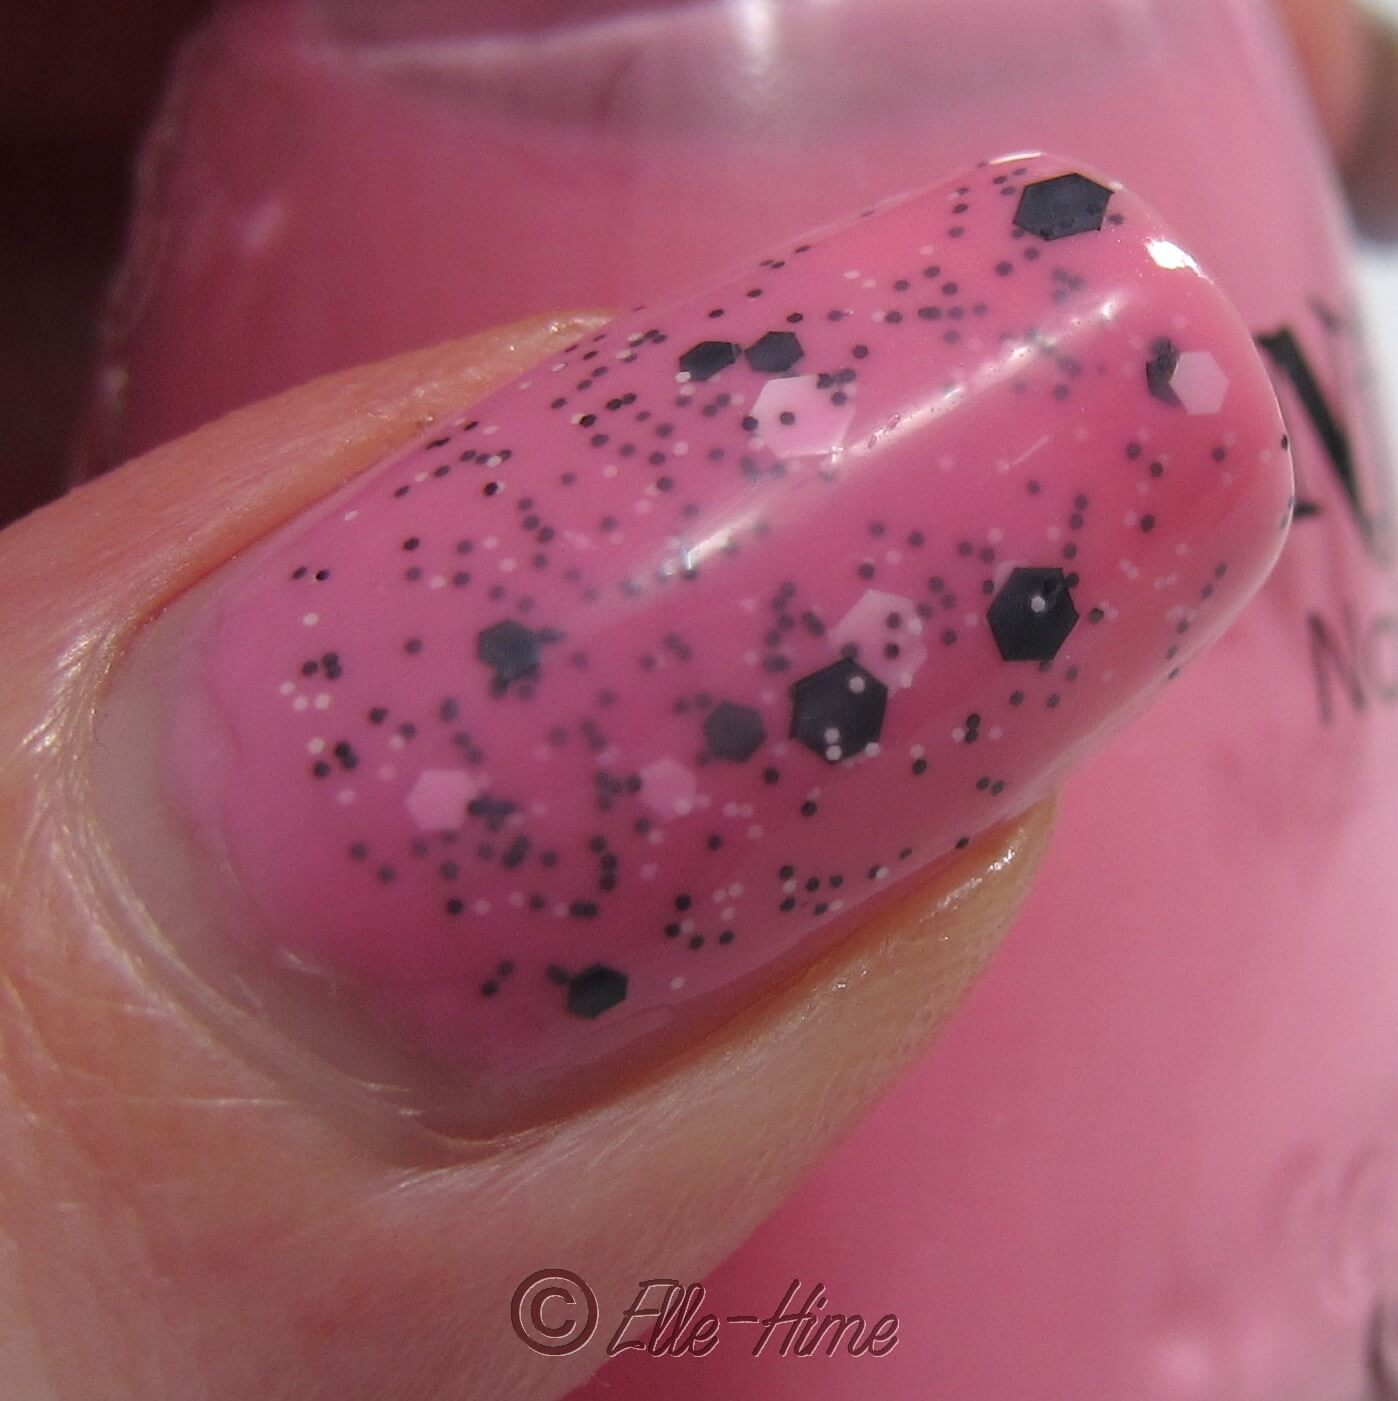
   I loved this look so much!  It seemed like my nails were tiny pastel dinosaur eggs, hehe.  I used one coat of my Poshe topcoat to seal everything in and they dried to a super-shiny smooth finish.  Three coats of these polishes made for good opacity, though they were still sheer at the tips.  You could use a creme-glitter-jelly combo if you have a creme that would match one of these jellies.

   My pink thumbs were my favorite nails of all, if only because I think pink, black and white is an awesome combination!  I would wear a complete manicure of any of these colors, but especially this pink!  I was also very happy with the wear I got out of this manicure.  It stayed very shiny and it didn't get any chips.  I have always been impressed with my Nfu-Oh polishes and these followed that trend.


   I'd definitely recommend these polishes if you like the jelly look and what you can do with them.  If pastels aren't your thing there are a bunch of other colors in this line, too!  I buy my Nfu-Oh polishes from FabulouStreet.com - the customer service is great!  Social Suicide is available in the Different Dimension etsy shop!  Let me know if you have any of these polishes and what you think of them.  =)

Tuesday, December 4, 2012

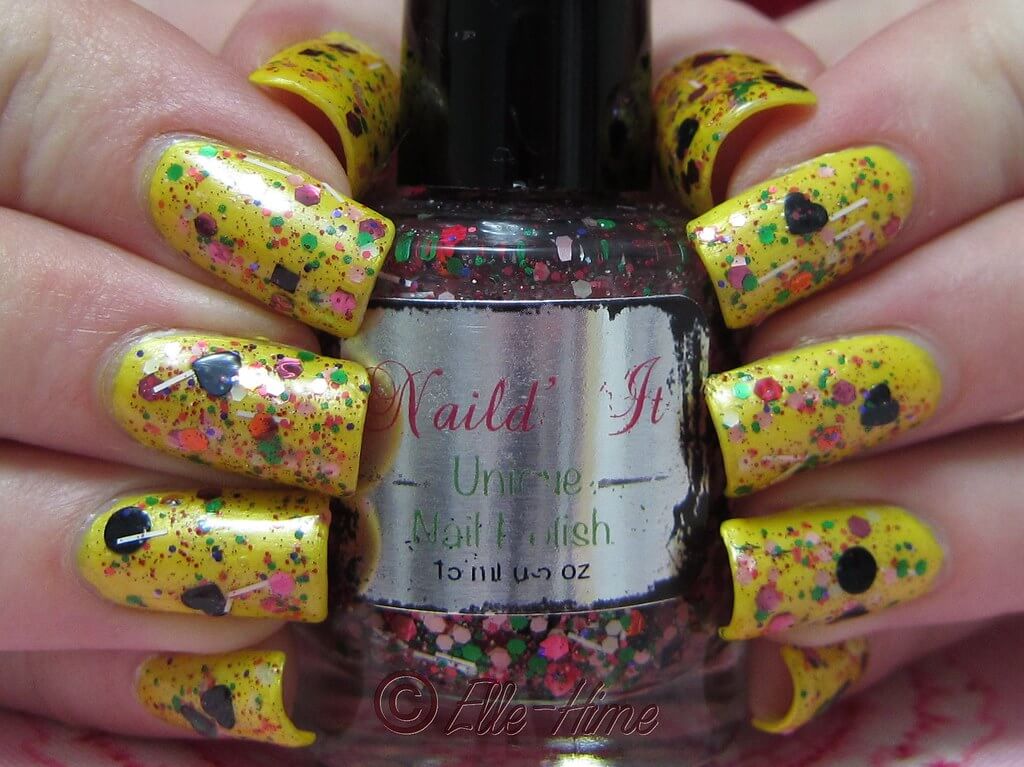
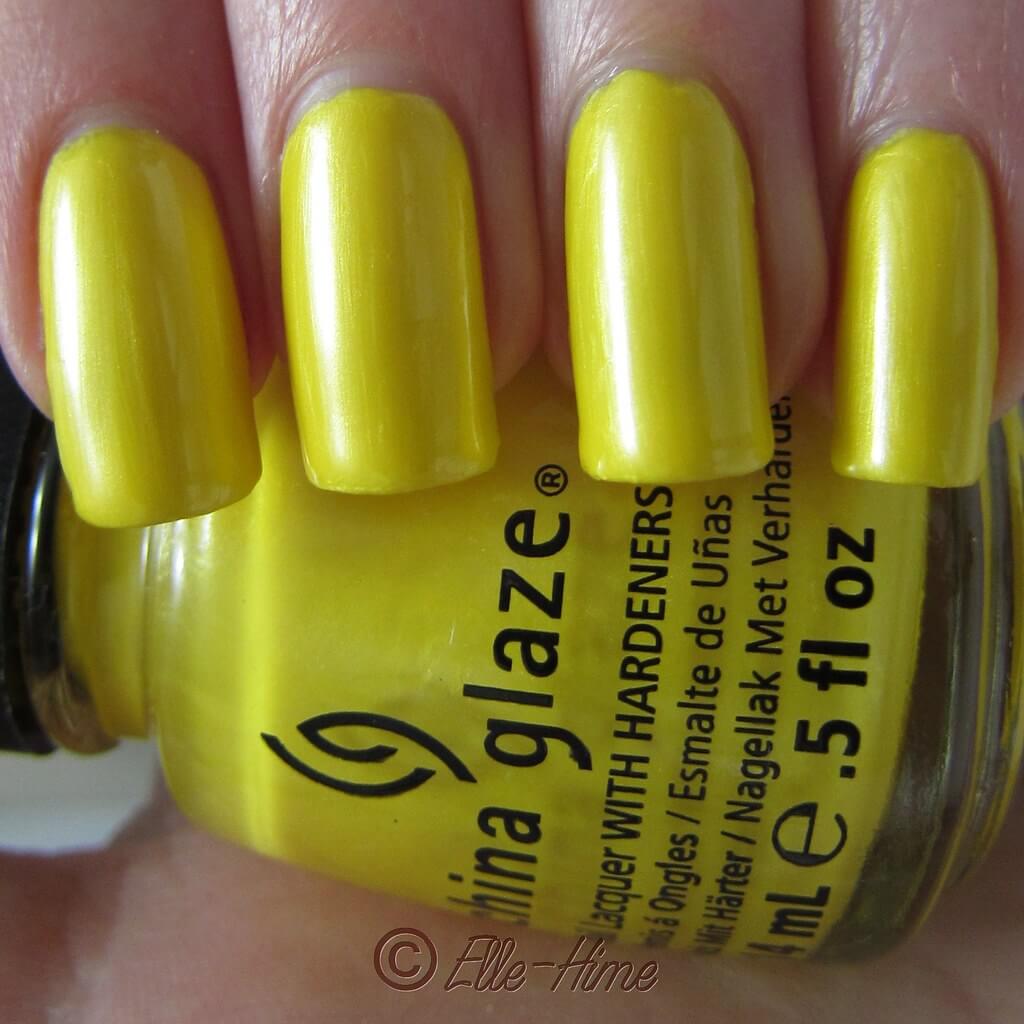
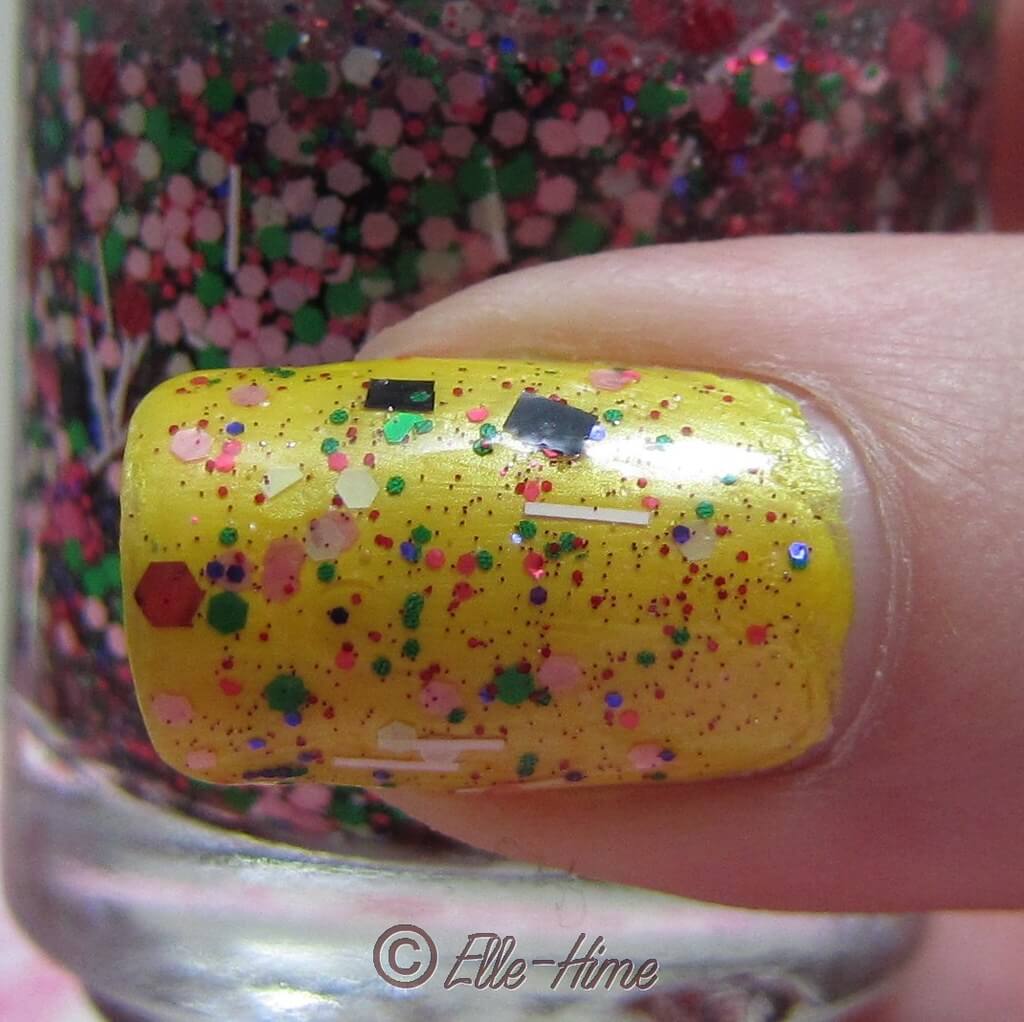
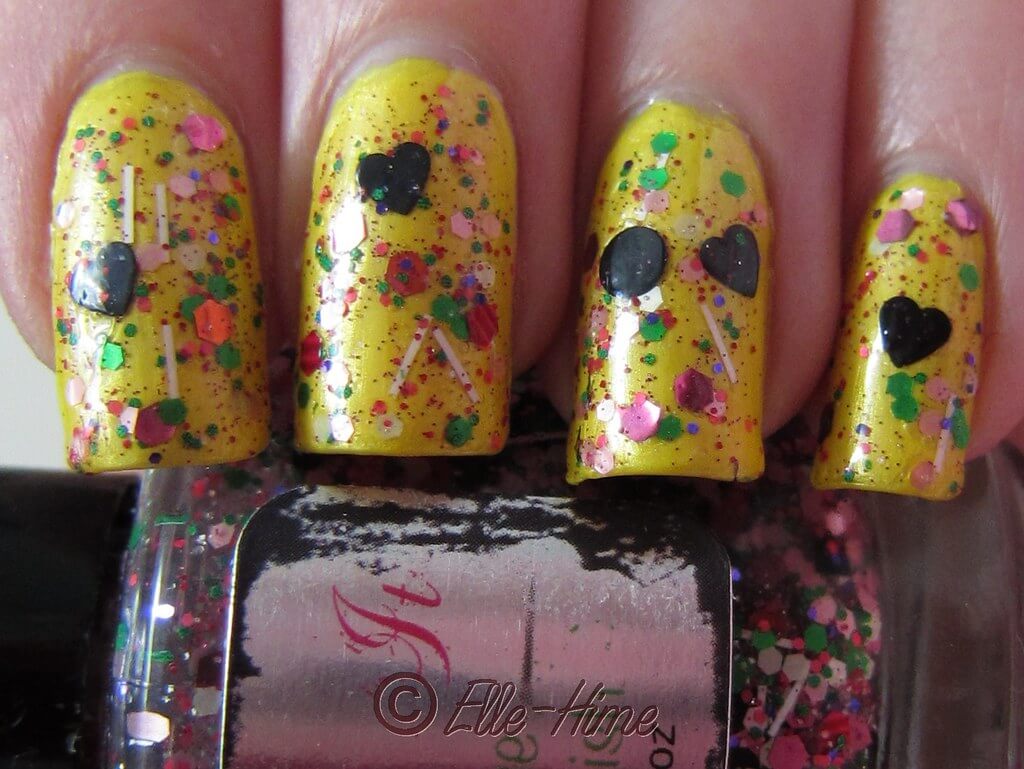
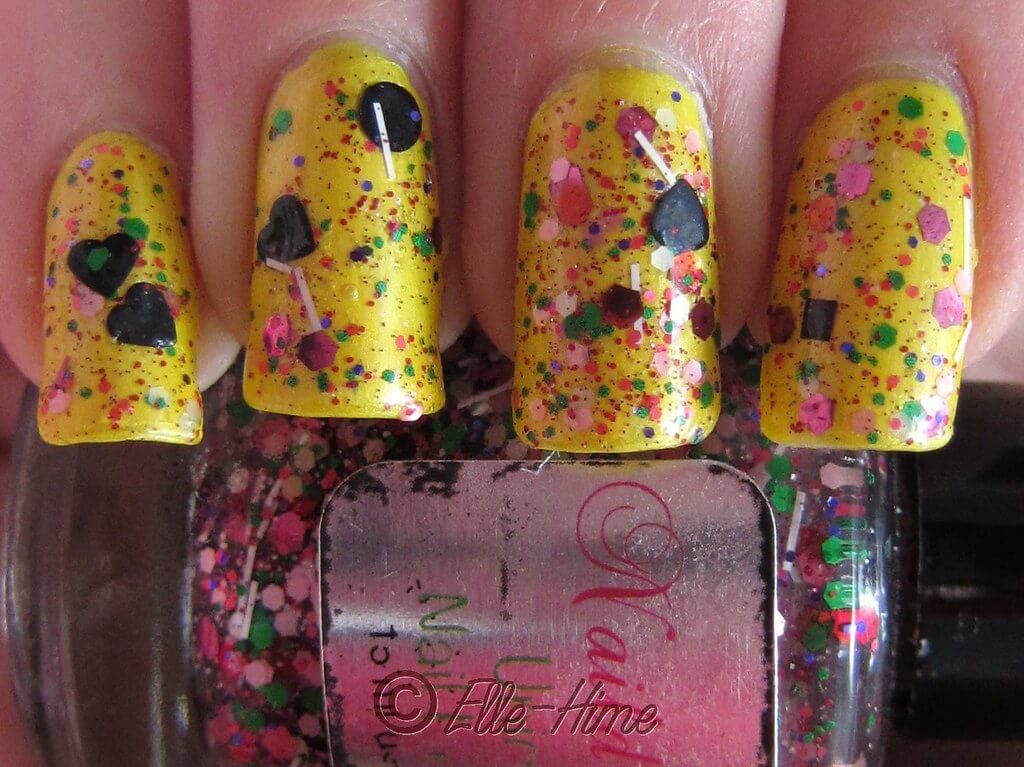
Naild'It - Summer Lovin' Melon & China Glaze Sunshine Pop

Swatch & Review

   Channeling my inner summertime was very easy yesterday.  I ate lunch outside sitting in sunny 52° weather, completely atypical of December 3rd in any other year of my life.  And with China Glaze Sunshine Pop and Naild'It Summer Lovin' Melon on my tips, it still doesn't feel like winter at all.


   This was my first time using Sunshine Pop.  It is a bright yellow with silver-white shimmer.  Basically China Glaze Happy-Go-Lucky with a slight frost.  The bright yellow isn't the kindest to my skintone but I love it anyway!  My first coat of Sunshine Pop was was a thick, streaky mess.  It had issues with bubbling and I was almost ready to call it quits right there.  I kept my wits about me, dropped some polish thinner into the bottle, shook it again, and was able to continue without bubbles, fortunately.  It still took two more coats to be decently opaque, and then it had more frosty brushstrokes than I liked.  I immediately followed with my fast drying topcoat and that evened it out wonderfully.  In the end I love it!


   What do you think?  It isn't the best formula I've had to work with, but I think it is worth the three coats.  Topcoat made all the difference in my attitude going from "meh, it's so-so" to "wow, candy-colored-sunny-bright-goodness!"  And I knew it would also be a protective barrier between the glitter that was about to go over top.


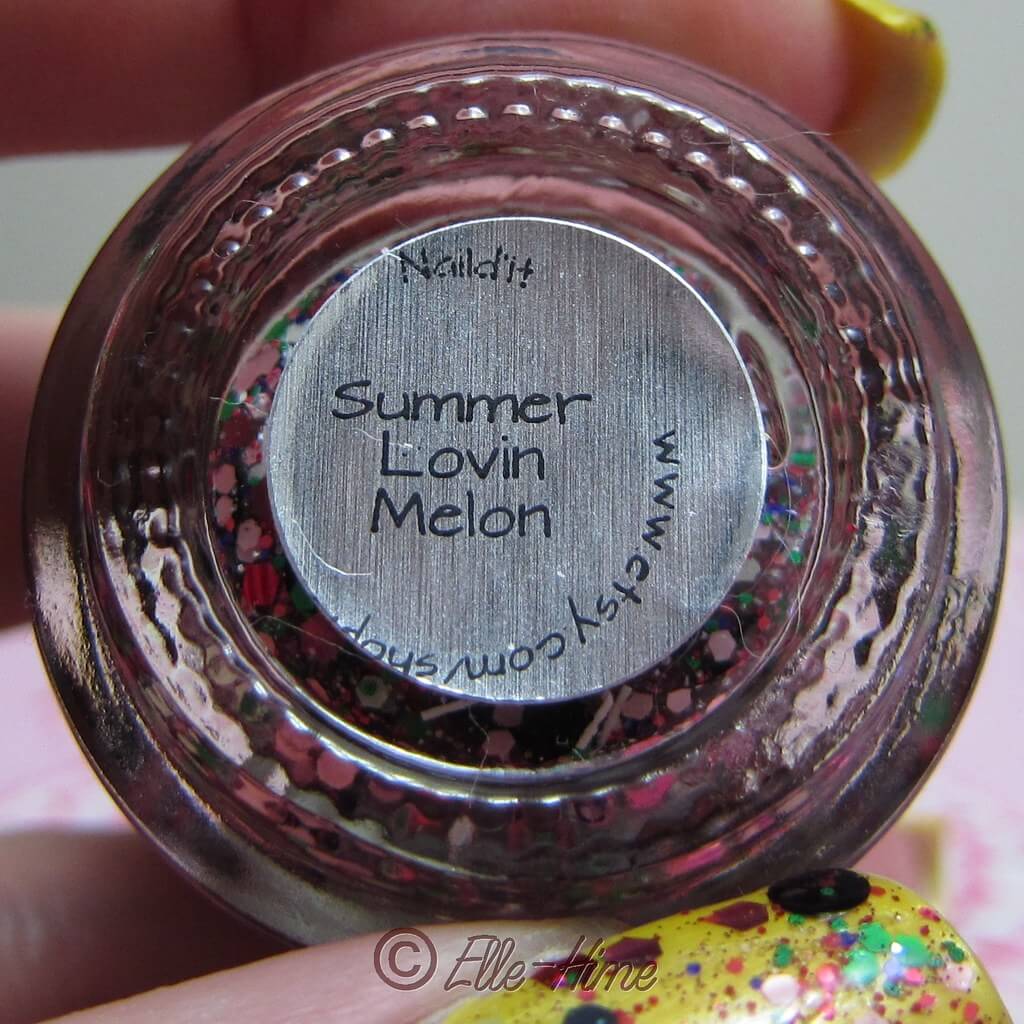
   I was fortunate to win a bottle of Naild'It polish from Kim at OverallBeauty.  She offered it as a prize in a water marble contest. Summer Lovin' Melon is my first bottle from the brand.  It is full size (15ml) and has silver printed labels, but some words aren't easy to read.  I really like the sturdy bottle shape, but at first the stubby handle looked goofy to me.  The brush and handle are perfectly good, though.  Now I love how the handle is flat on top.  All I had to do was turn the bottle upside down (I think I left it for a half hour?) before using it and I had no issues getting the glitter out!

   In fact, a lot of times I was wiping glitter back in.  The formula is very thick.  This helps the glitters not to slide around when applied but you do need to watch out for brush overload!  Looking at the bottle it can be hard to tell what is hiding in there.  I didn't realize that it includes black circle glitter until one came out on my brush, and then another, and another!


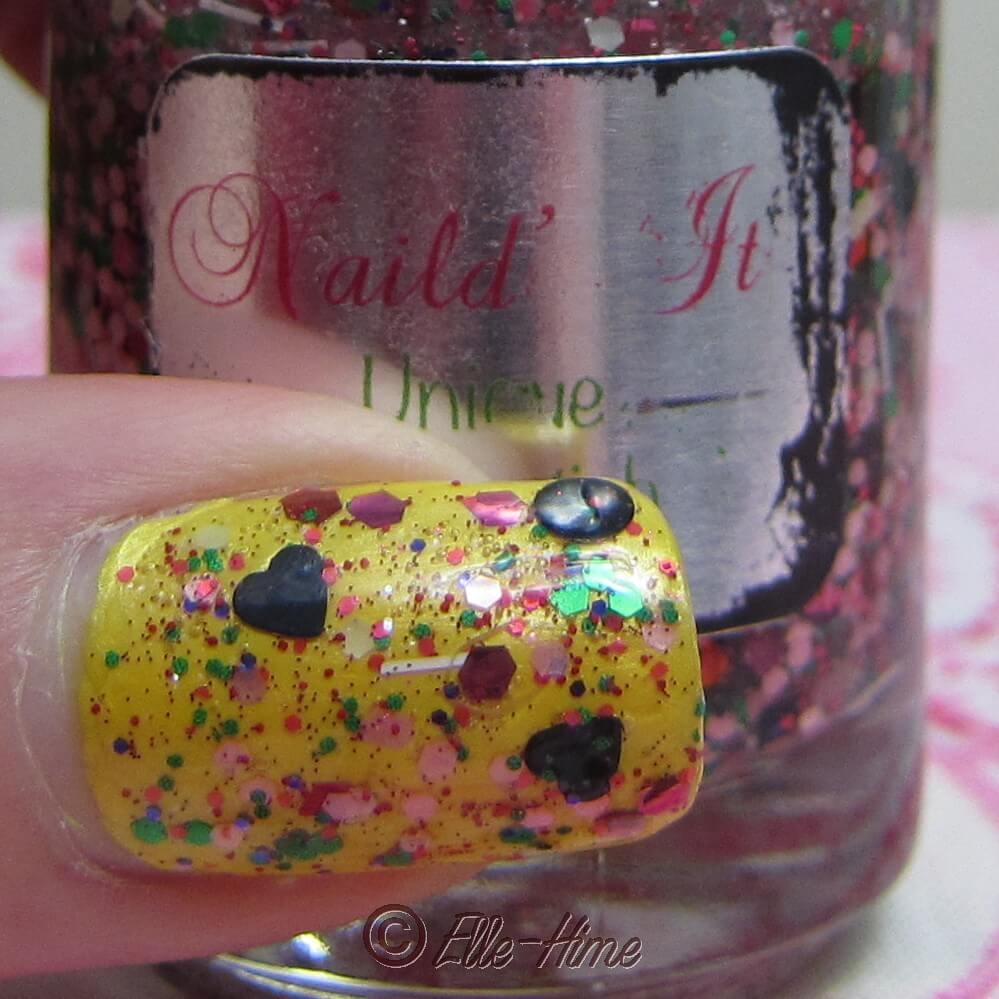
   I used two coats of Summer Lovin' Melon, but would be happy with one, as well.   The glitter is easy to apply and only needs dabbing to cover thin spots.  The large black hearts and circles were often on the brush without me realizing.  There are black squares as well, but these seem more sparse in the formula.  The other colors are large pink and orange hexes, white bars, striped matte red hexes, satin green, purple, light pink and white hexes.  Microglitter comes in red, too.  I chose a yellow base to show everything off, but next time I'll try a watermelon pink to get it's namesake look.


   I had to photograph both of my hands to show how colorfully my nails turned out.  Yes, this is a chaotic polish, but it is fun and eye-catching.  I just wish I would have had sunshine when it came time to do these pictures!


    A word on topcoat.  I used two coats of Gelous and then a coat of my thickened fast-dry top coat.  While not a topcoat-thirsty glitter the larger pieces will stick out.  I sealed them in this way and there are only a couple spots that have a bump.  This doesn't bother me any, but it is worth noting.  This ended up being a very thick manicure but that is what I was going for - my nails have been "tough as nails" since applying it.  (From start to finish I did 10 coats of my nail polishes on each nail...)

  In the end I have been pleasantly surprised by this busy glitter polish.  Judging by other swatches Online I thought it would apply as small glitter with a stray heart here or there, but that wasn't the case.  It was easy to work with, and is my first polish to contain those awesome circles.  Right now the Naild'it etsy shop is closed, but you can buy these from various indie polish e-tailers.  They go for about $10-$11 from what I've seen.  Honestly that is steep for me so I'll probably hold off on these unless I really love the color.

   I hope you found this manicure helpful.  Let me know your thoughts in the comments!  =)

Wednesday, November 21, 2012

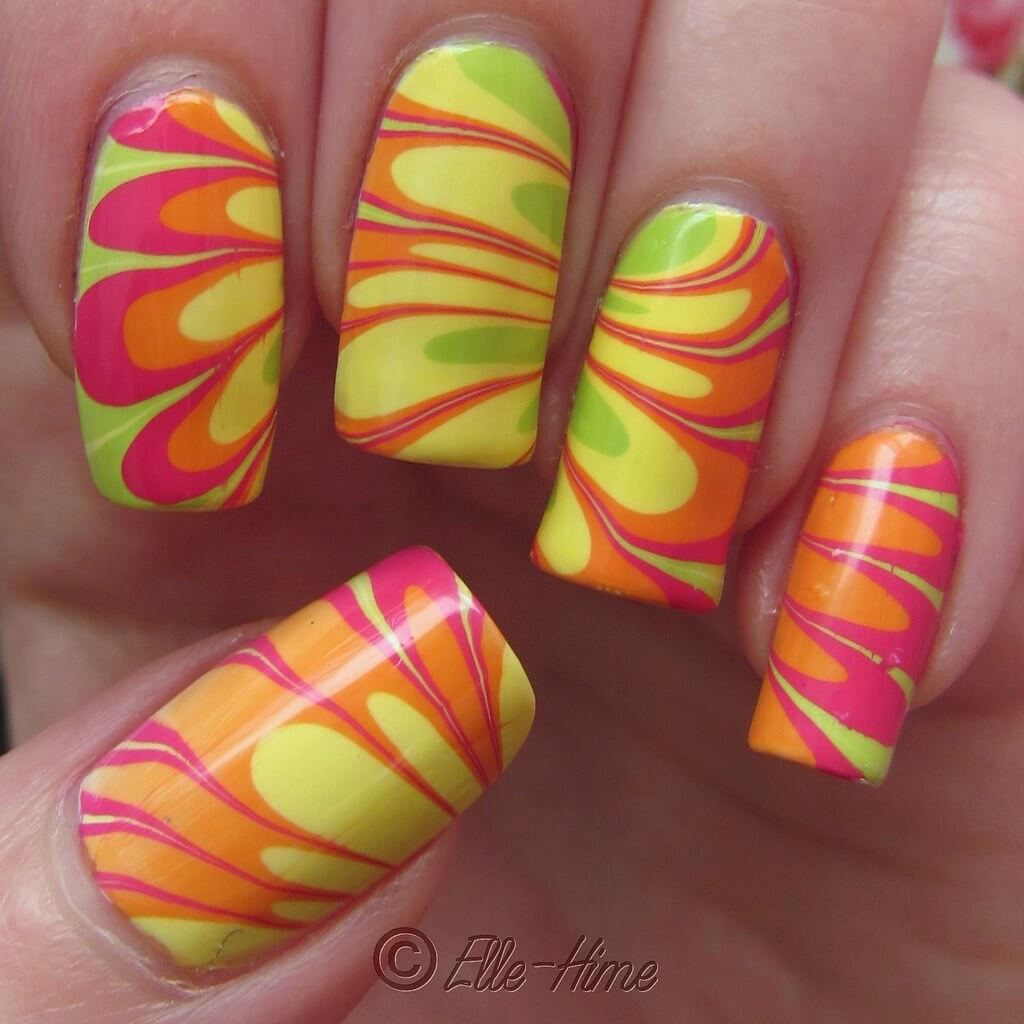
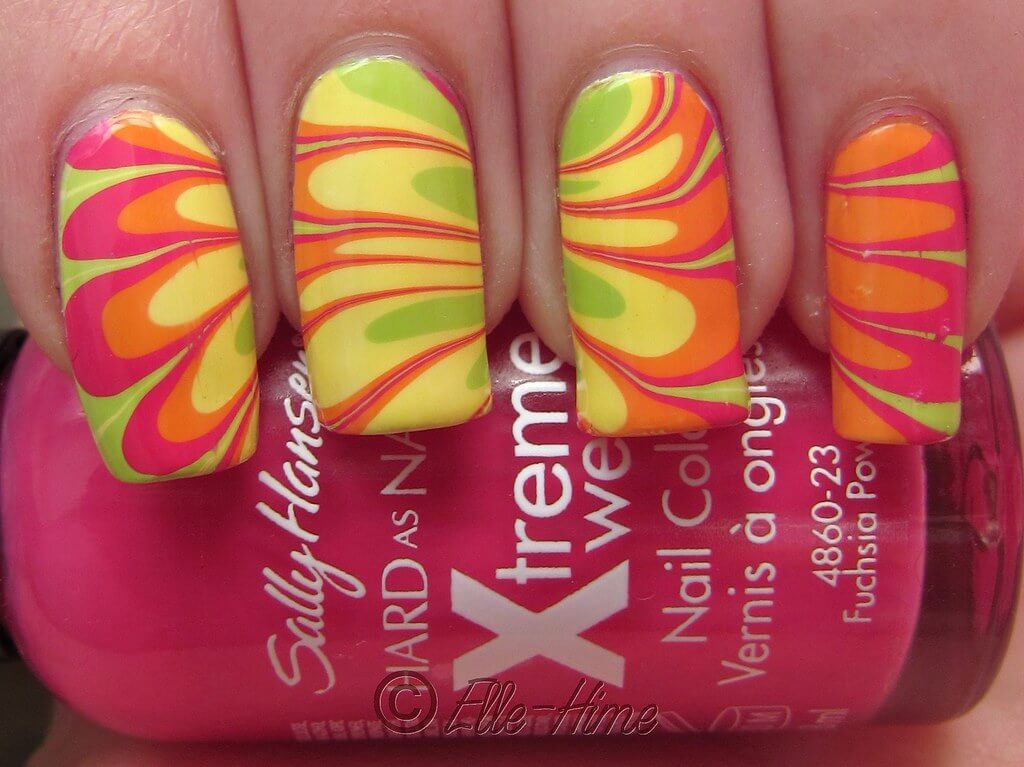
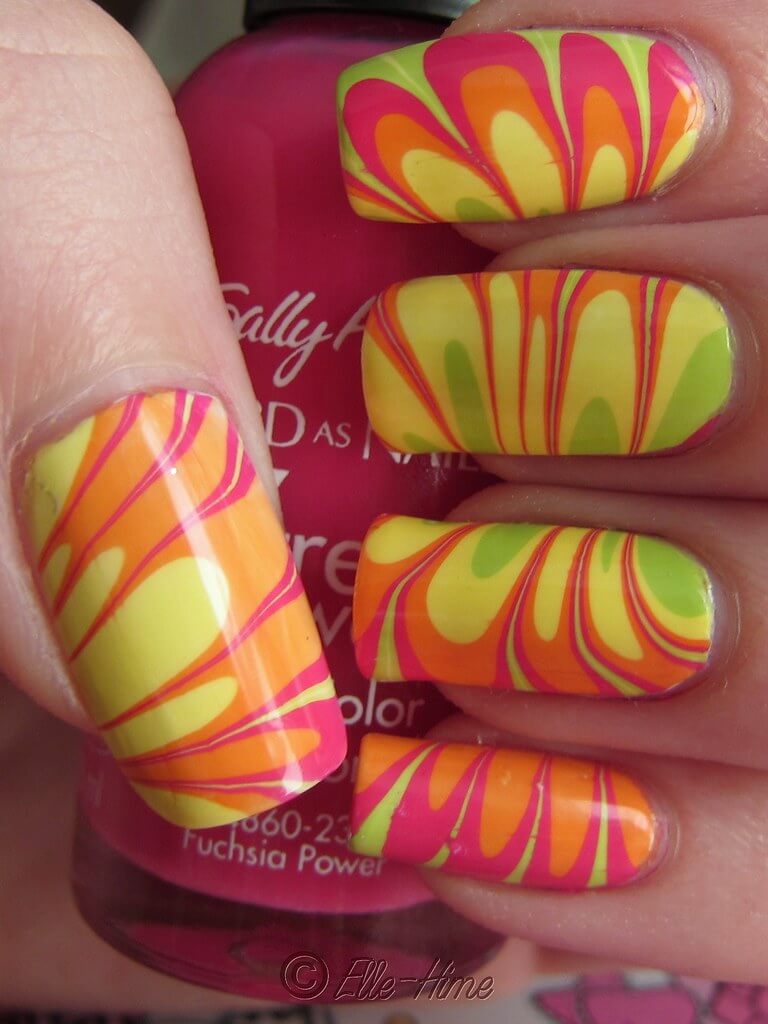
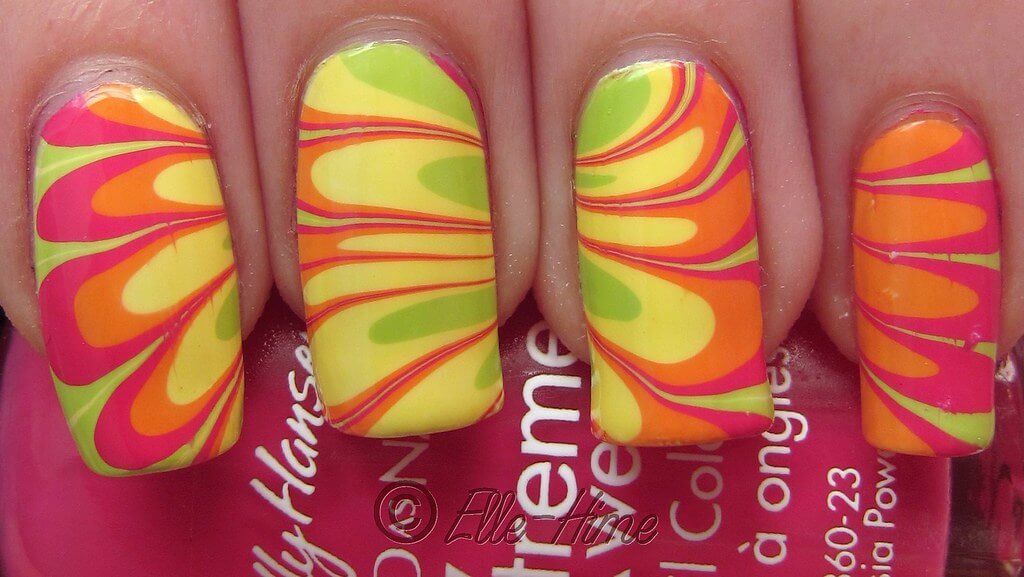
Water Marble: Citrus Splash

NotD / Nail Art

   It dawned on me as I prepared this post that this will be the first water marble I've shared on my blog.  Actually, it's only the second one I've ever done.  So, I'm very proud of this post!


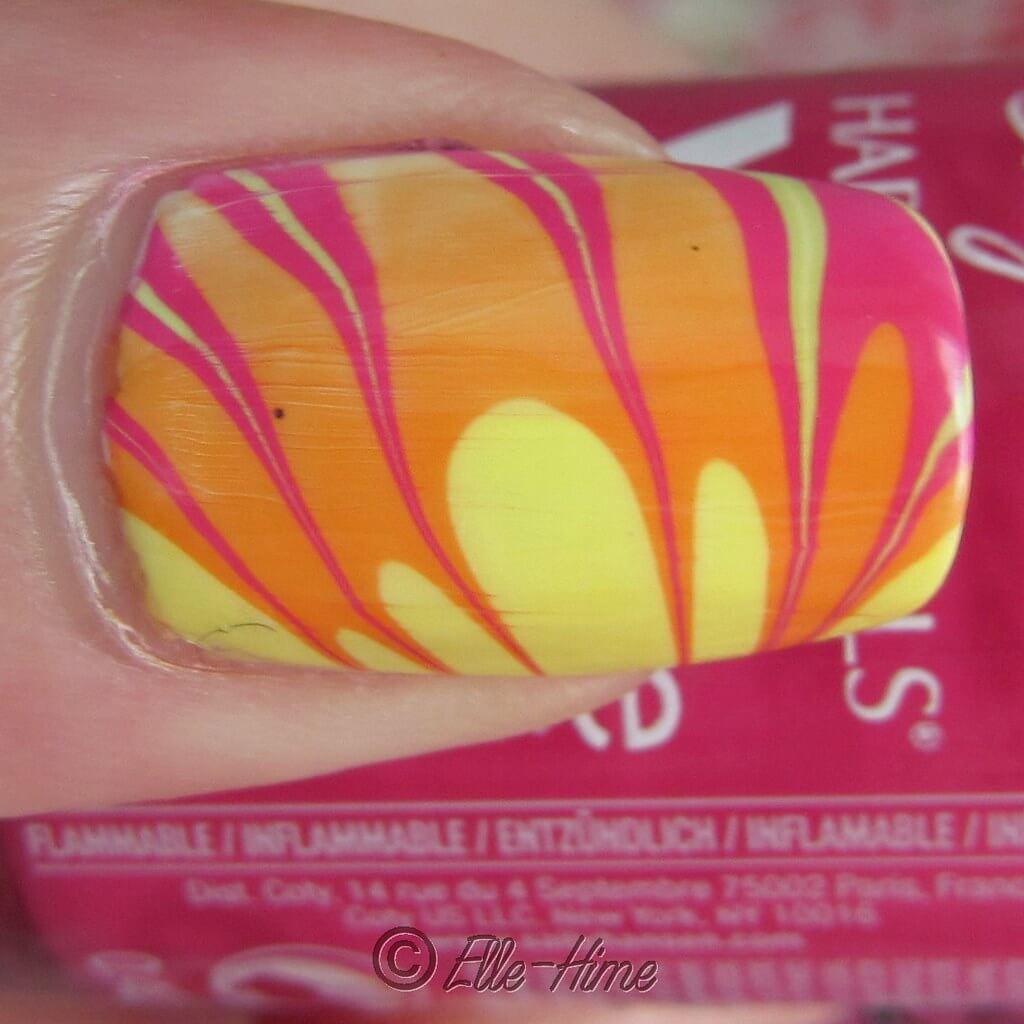
   This post also marks the first time I've used the "orange" color tag on my blog.  Orange isn't something that I'm usually drawn to, but when I saw these four colors next to each other I knew that I would have to do a marble with them some day.  They are just so happy and bright!  These swirls bring to mind limes, lemons, oranges and (my favorite) pink grapefruit!  Or blood oranges; those have a wonderful color too.

Source - edited my me

   I started with a white creme base to make the colors pop, and my water marble colors were all from the Sally Hansen Xtreme Wear line, because as of yet they are the only ones that I have been able to get consistent results marbling with.  (Hey, I said this is only the second marble I've done, not my second attempt!  Lots of trial and error!)  The colors are Fuchsia Power, Sun Kissed, Mellow Yellow, and Green With Envy.

Fun fact: this is the first pic I snapped of these nails, and it is the 2,012th picture I've taken with my camera!

   I had tragedy strike when I applied topcoat, though.  There was some dragging, which is quite upsetting.  =(  Fortunately I noticed it right away and was able to save my designs for the most part.  Then I ended up with a small black fuzz on my thumbnail, which I had no way of getting out without causing further damage.  >_<  These things aren't noticeable unless you look very closely...  I got over it pretty quickly.  =P


   I'm entering this design in Smashley Sparkles water marble contest.  That is one of my favorite blogs - check it out!  As soon as she announced the contest I knew I had to enter.  I had been wanting to do another water marble anyway; this gave me extra incentive to practice and get it done.  Still, I don't envy her job of choosing winners - everyone who entered has such a gorgeous design, they are all so unique!  You never know exactly what you'll get with a water marble, and I think that is part of their charm.  =)


   Have you tried water marbling yet?  If so, what polishes work for you?  If you haven't gotten it to work yet, don't give up!

Wednesday, February 8, 2012

Trying China Glaze Aquadelic & Dance Baby

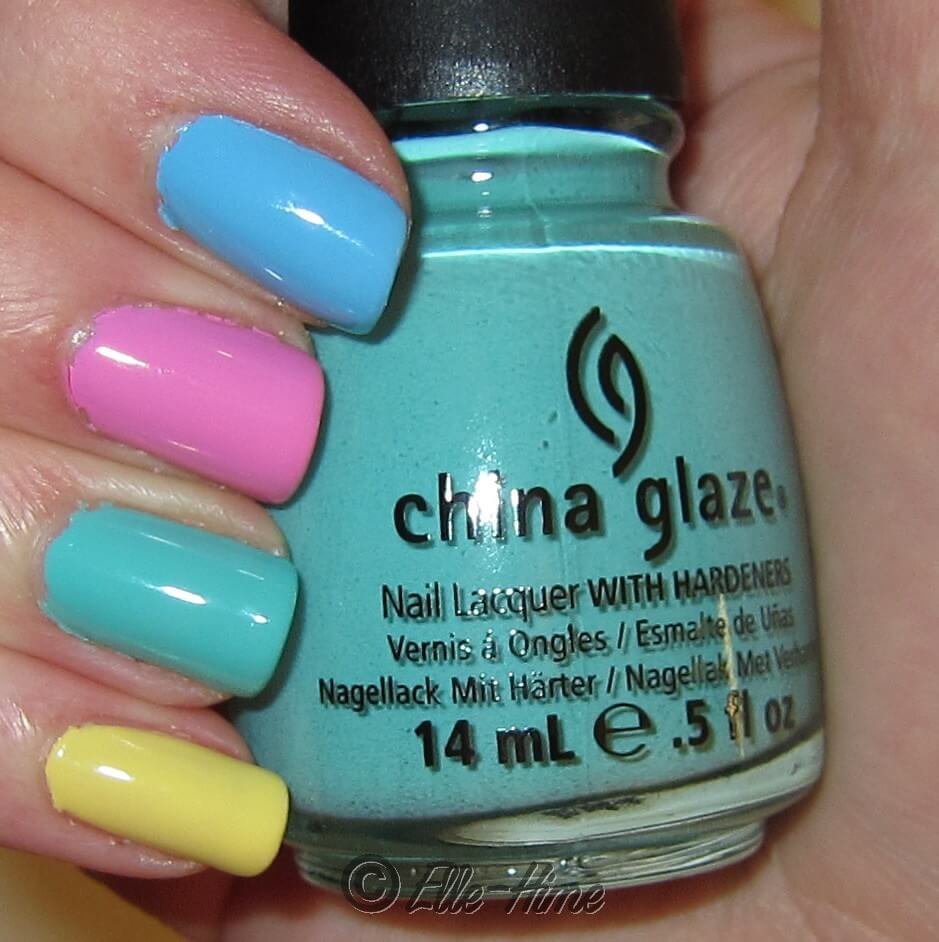
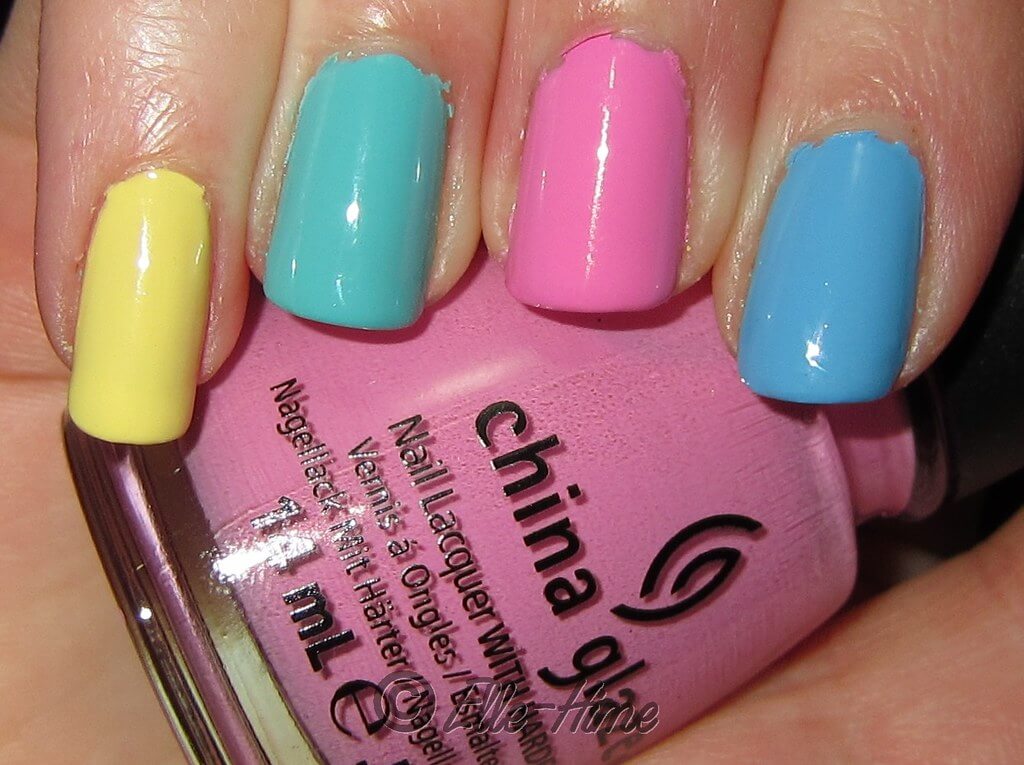
   One of my favorite things to do when I get new cremes is to come up with a rainbow mani of coordinating colors.  It's so cute and gets tons of compliments!  And I get to try several colors at once, heheheh.  ;D


  The colors I used are China Glaze Lemon Fizz, Aquadelic, Dance Baby, and Bahamian Escape.  2 coats of each and they were all a dream to use.


   I'm so glad I got Aquadelic!  Yes, it is super-similar to For Audrey, but it is more green and doesn't have the dusty quality that For Audrey does.  They are both lovely colors, I know I'll use both.  Did you get any of the new Electropop colors yet?

Monday, January 30, 2012

Love & Beauty - Sea Stars = Happy Nails


   I picked one nail polish out with my last Forever 21 order.  I'm always drooling over their accessories and every so often they have some neat polish up for grabs.  I don't have a F21 store nearby, so I just chance it going by Online descriptions, and get to be surprised when it all arrives.

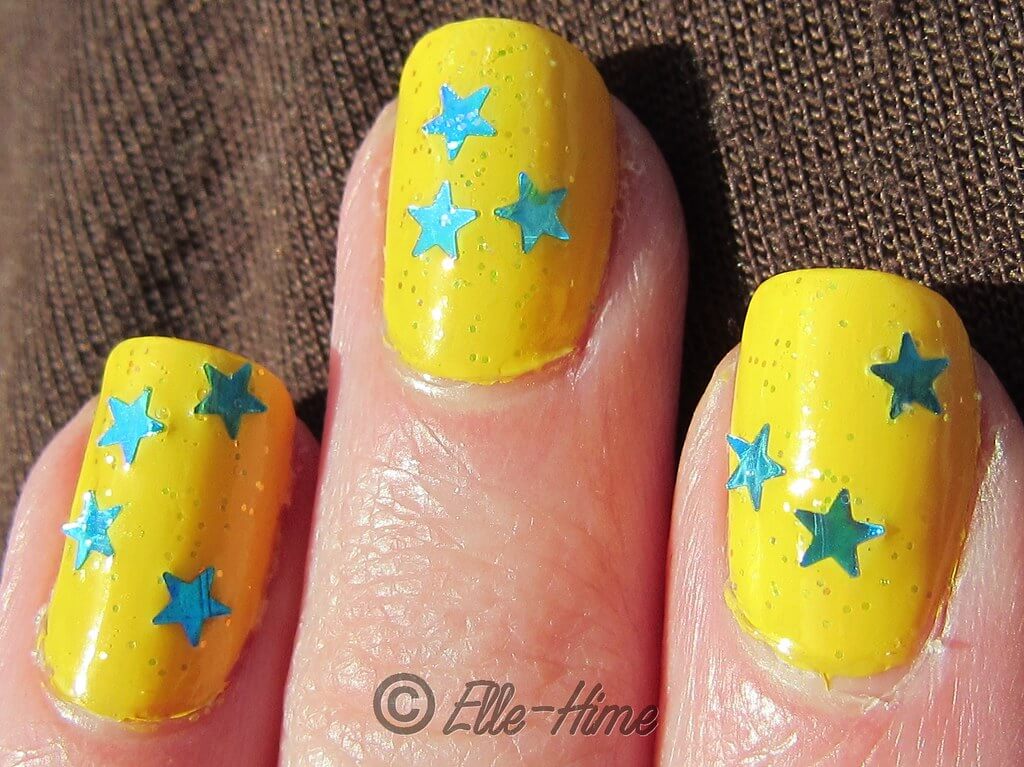
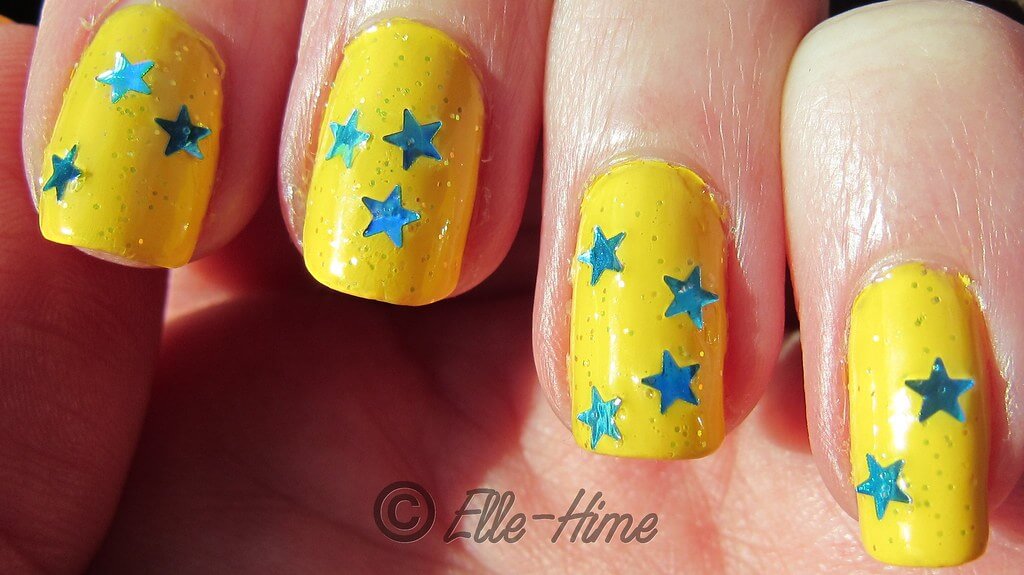
   When I was unpacking this bottle I was at first afraid it wasn't going to work for me, seeing all the orangey-yellow sparks in the bottle, but then I looked closer and I realized it is something special.  This nail polish has no real name - the label just says Blue/Clear; Online it is listed as "Blue Stars Nail Polish".  But when I looked at it in person, saw the flashing aqua-blue stars and unusual iridescent glitters, to me this polish is Sea Stars.

   More about the glitter polish after the jump.  I have to say that last week was really, really rough for me.  I was having a bout of being depressed, sad, whatever you want to call it, and after a week I really wanted my usual chipper demeanor back.  (So did my family and boyfriend, it was rough for all of us.)  So when it was time for my nails to be refreshed I went for the happiest color I could.  China Glaze Happy-Go-Lucky was my yellow creme base - 2 coats.  It actually looks better on my skintone than these pictures suggest, but it is pushing for me, I know.


   Fortunately my mood did pick up yesterday, along with the sunshine.  These nail pictures are taken in full sunlight, no flash.  (Love my new camera - I took these in a moving car!)  If you'd like to see glitter bottle shots keep reading!

Friday, January 20, 2012

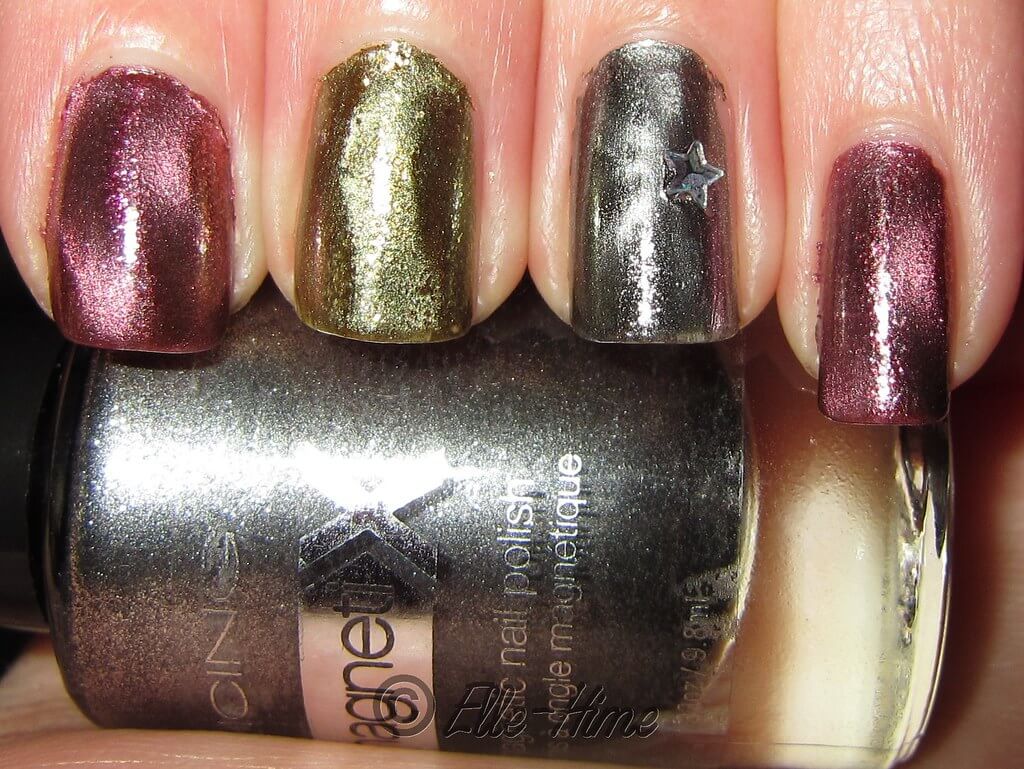
NotD: Icing magnetiX Glitter Colors! (new camera!)

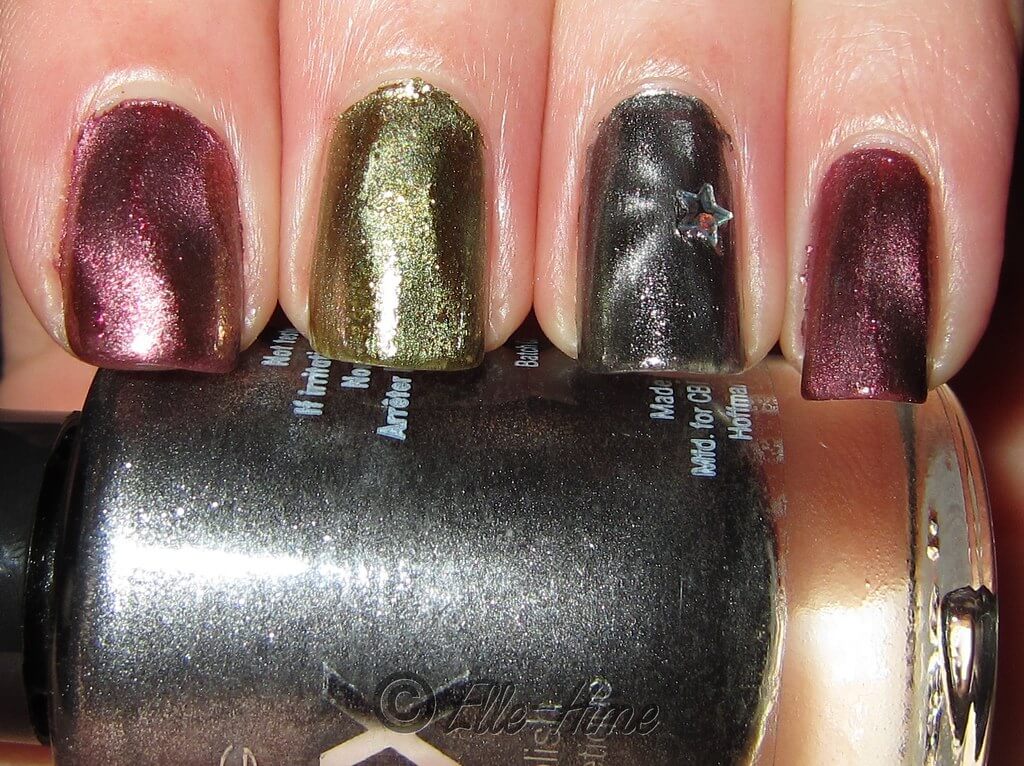
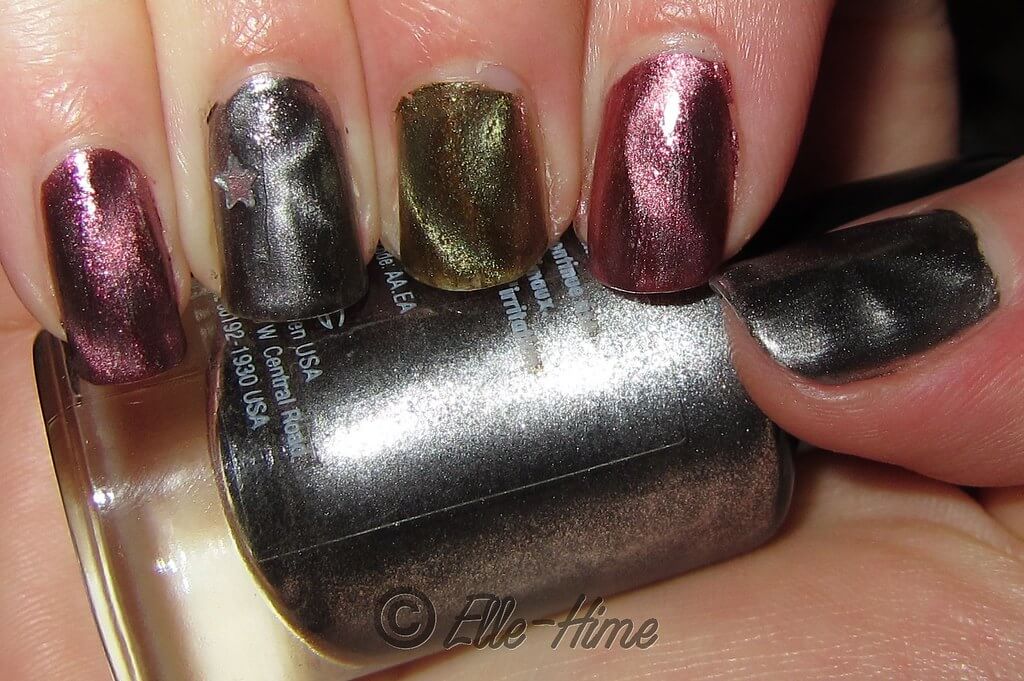
   Hello all!  I don't generally put up two posts in one day but this is related to my previous post about the Icing magnetics - it's the polishes on my nails!  If I had added my manicure the post would have been too huge, I think.  So, here are some additional pictures and thoughts about my nails... and some exciting news - I have a new camera!

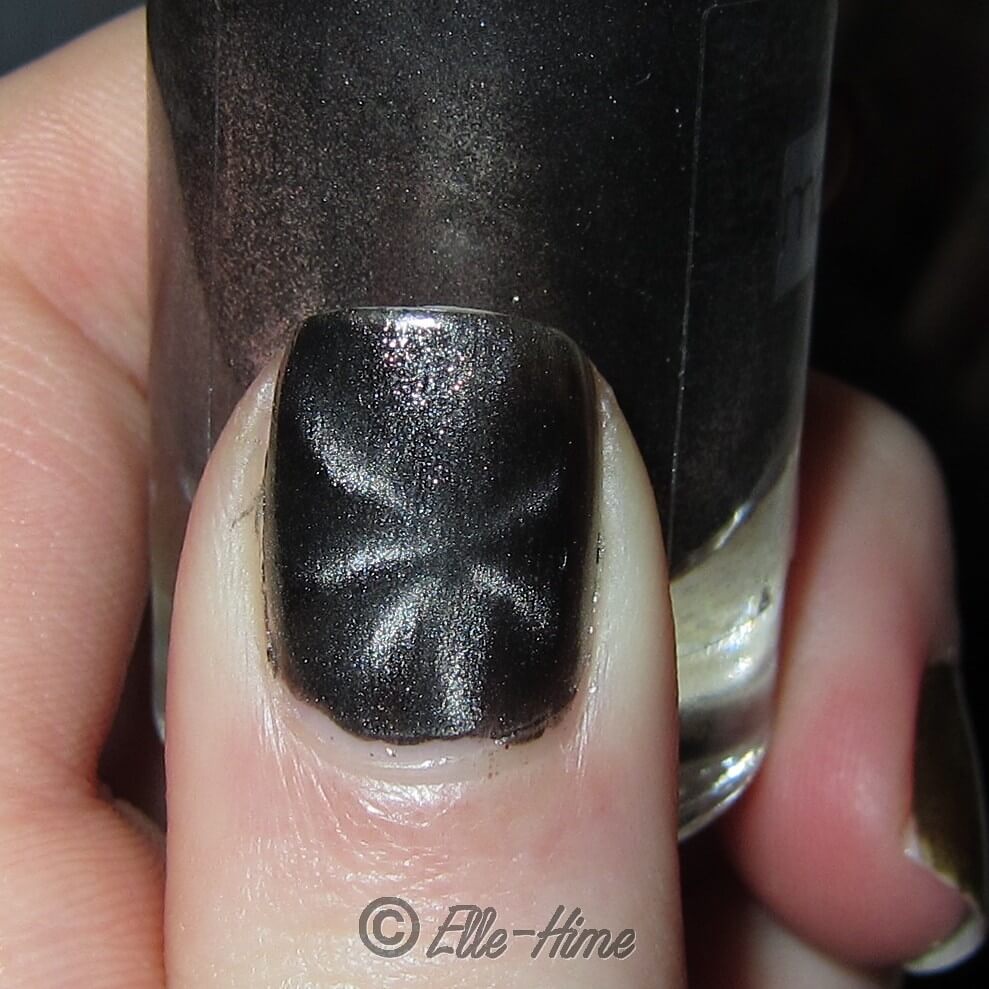
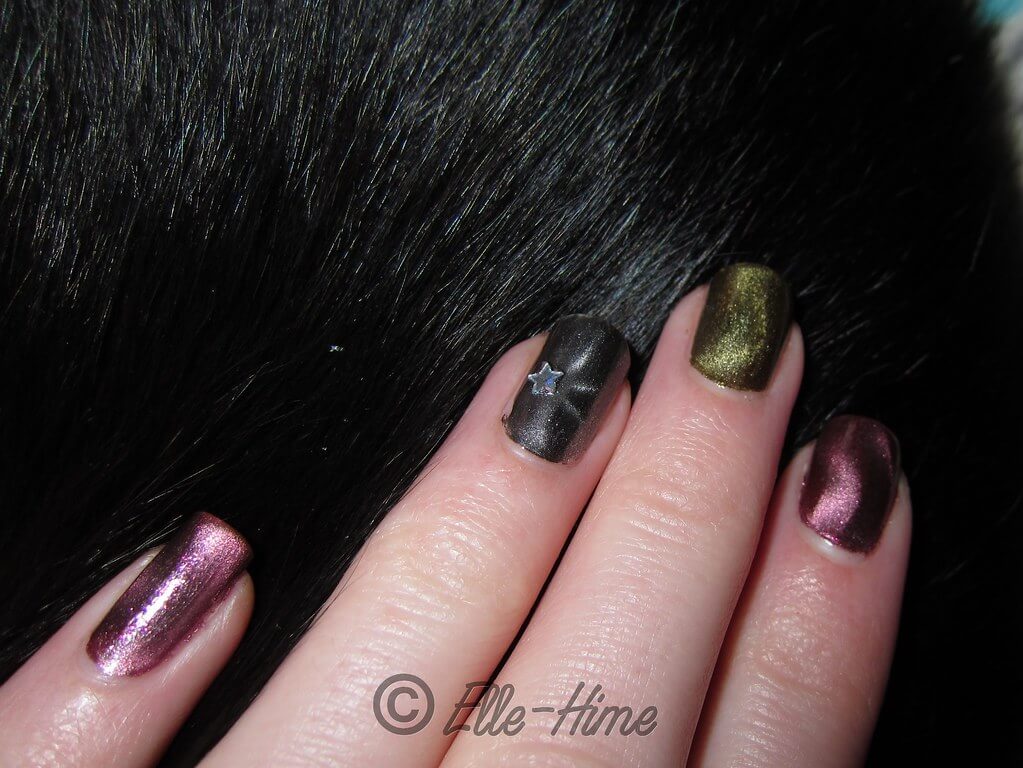
   The colors are Rose Sparkle, Antique Brass Sparkle, Black Sparkle, and then Rose Sparkle again.  I skipped out on using Blue Shimmer because it doesn't have a glittery finish like these do.  I'll do that one another time.  There is top coat in these pictures,  but not a very shiny one.

   I think the magnetic designs came out better on my right hand.  I used the wavy-design magnet on all my nails save for the black ones.  I used my LCN star-pattern magnet for those.  I love the wavy magnets.  It looks like ribbons running down my nails!  And each ring finger got a holographic silver star paillette applied to one side.  The magnetic pattern looks like shine rays coming from the stars.  =)


   I just have to say it's so much easier using magnetics on my own nails, rather than swatching a nail wheel.  Having to hold both the wheel and the magnet - carefully! is just about as much as my shaky hands can muster.

   I just got my camera a couple days ago, it's a Canon which I never thought I would buy.  My boyfriend has a Canon and while it takes great pictures I never liked using it myself.  This one has the kind of controls I like, though.  In fact, it mostly done by touchscreen.  Anyway, I'm still getting used to it and what settings I should use.  I'll probably make a separate post about my camera when I have less awesome nail polish to blog about.  ;P  But I have to ask: can you notice a difference for the better?

   My kitty was in my lap during my Nail-of-the-Day pictures.  So, here are my nails, on her pretty fur!  This actually came out really well-focused (click to see larger).  I don't know about you but I think she looks great with these polish colors, too.  Good thing cats don't have fingernails.  =P


   One more picture of my nails for the road!  Thank you so much for reading and if you have any thoughts please share them.  =)


Monday, December 26, 2011

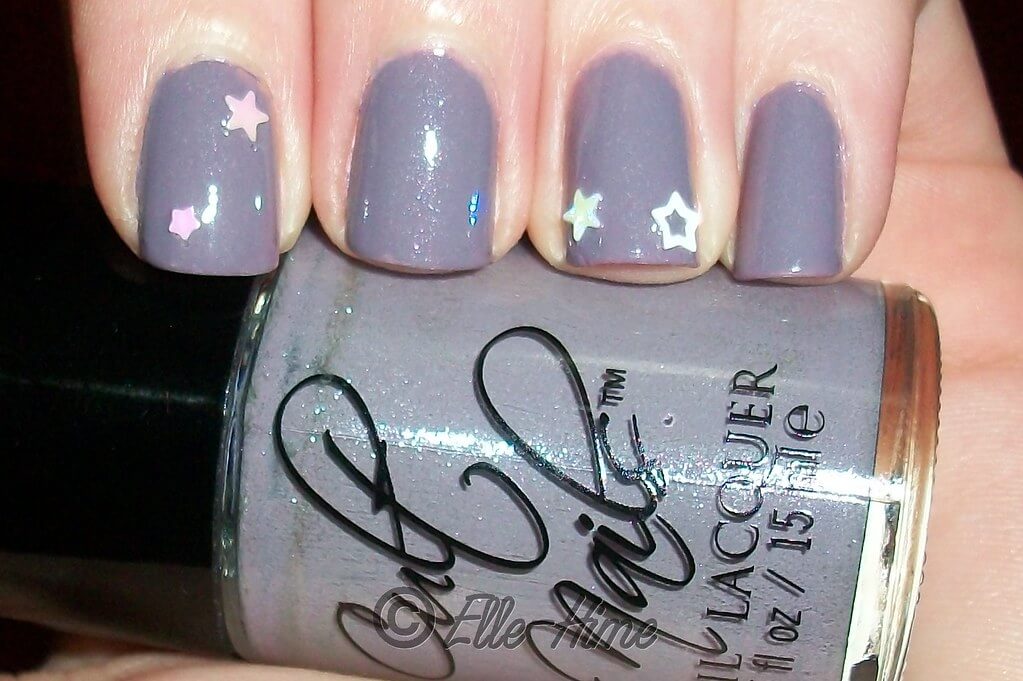
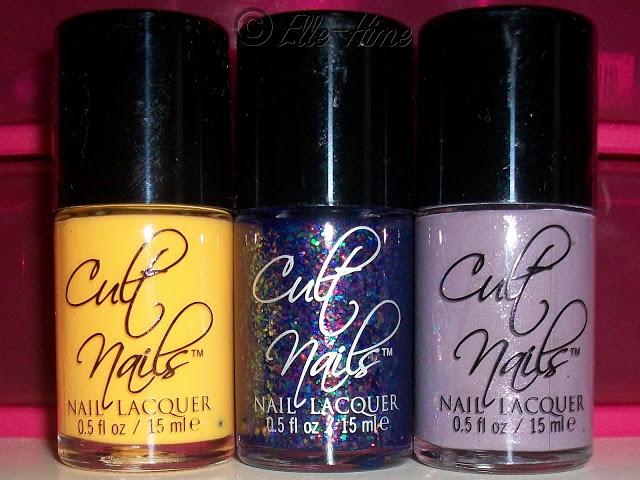
Cult Nails - My Kind of Cool Aid & Haul

   I'm at the point where I have so many new polishes that I can hardly decide what to put on my nails next!  I made my first Cult Nails order last month and finally decided to ignore all the other new things and try a full mani in the color My Kind of Cool Aid.


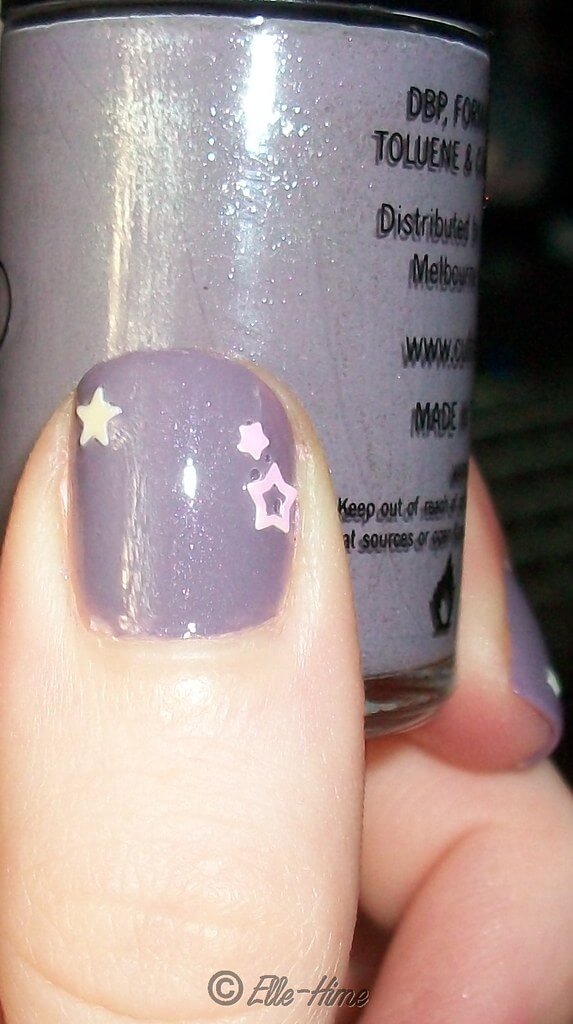
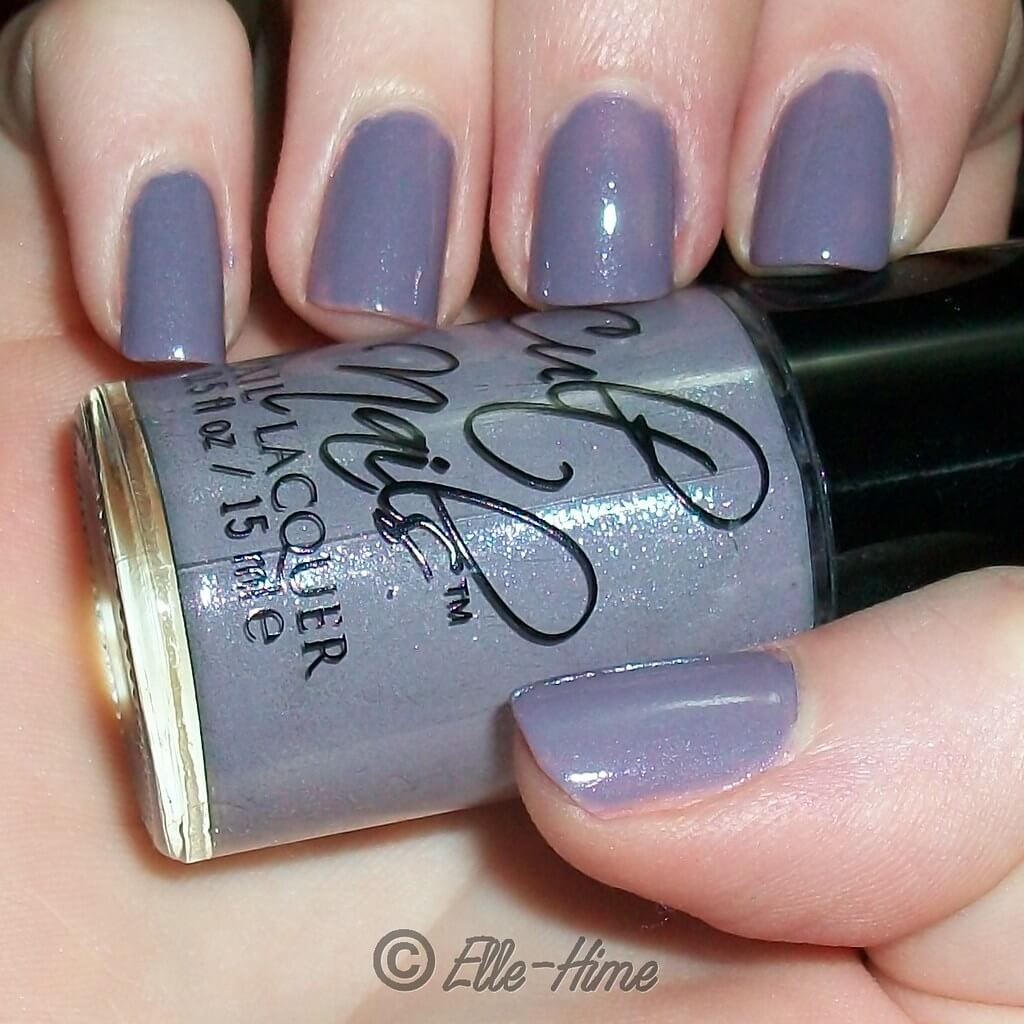
   It is definitely My Kind of Color!  In most lights it looks a little darker than this.  A muted, greyed-out lavender with silver shimmer.  The shimmer shows more in the bottle than on the nails, but it gives the creamy polish some character.  Also this doesn't dry very shiny on it's own, but a top coat glossed it right up.


   I added a few star paillettes to some of my nails!  And there is my thumbnail, steadily growing back out...

   Even though it has a big round cap it was still pretty easy to paint with.  Not the most comfortable, but not bad like I expected.  I really loved the formula on this.  It was easy to work with and didn't destroy itself or create bald spots.  Also, the coverage on this polish is awesome.  Here it is at just one coat:


   Isn't this gorgeous?  My of my Cult Nails polishes were.  I picked up Time Traveler for my Mom so I don't have that one to show you (though I've seen it on her nails and can tell you that it is the prettiest deep navy-sapphire-blue).  I have Feel Me Up, Clairvoyant and My Kind of Cool Aid.


   Sadly I shouldn't have risked buying Feel Me Up.  It is not a yellow I will wear, so I'm leaving it brand-new and hopefully I can swap it.  (Anyone interested in this color?  It is currently not available from Cult Nails.)  Clairvoyant is awesome, of course.  Mom got a bottle of that, too.  I might have to do a full flakie manicure next!

   Anyone else use Cult Nails?  I guess I'm late to the party, but I am really impressed!