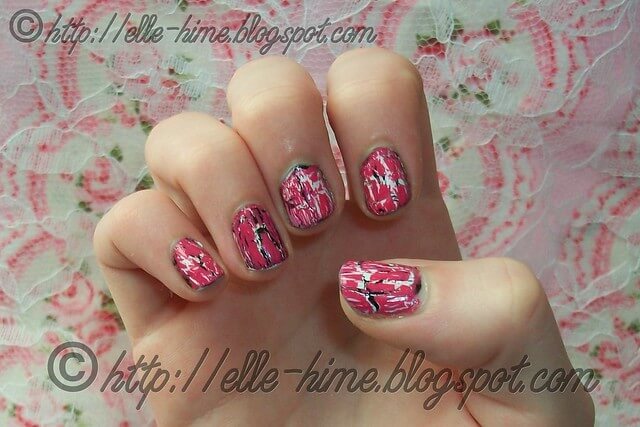
My current manicure consists of Essie cream colors that are buried by the wonderful China Glaze Crackle nail polishes. It was fun to do, incredibly easy, and I want to share it with you! Here is what I created:

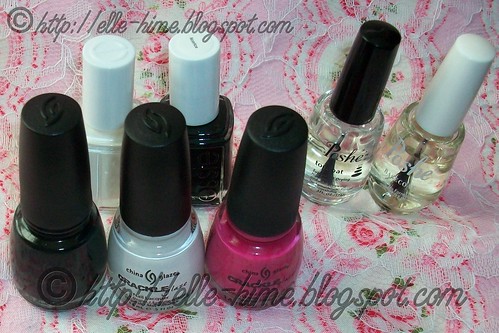
Using Essie Blanc and Licorice, China Glaze Black Mesh, Lightning Bolt and Broken Hearted, and my Poshe base & top coats. Read more to see the results, how to do it yourself, and a mistake to avoid!

There are my polishes… essentially what you will need is your preferred top/base coats, and coordinating colors in both crackle and regular formulas. Figure on 1-2 base colors and 2 or more crackle colors. This manicure has lots of room for variation, but for tutorial purposes here is the process of what I did:
- Prepped my nails and swiped a basecoat over each one.
- Put 1-2 coats of Essie Licorice on all my nails but the ring fingers, which got 2 coats of Essie Blanc. Then applied Poshe fast-drying top coat over all the nails, and let them dry completely.
- Swiped China Glaze Lightning bolt over the black-painted nails, and Black Mesh over the white painted nails. Applied another layer of Poshe fast-drying topcoat and let it dry completely.
- Added a coat of China Glaze Broken Hearted over all my nails, and another coat of Poshe fast-drying topcoat to finish it.
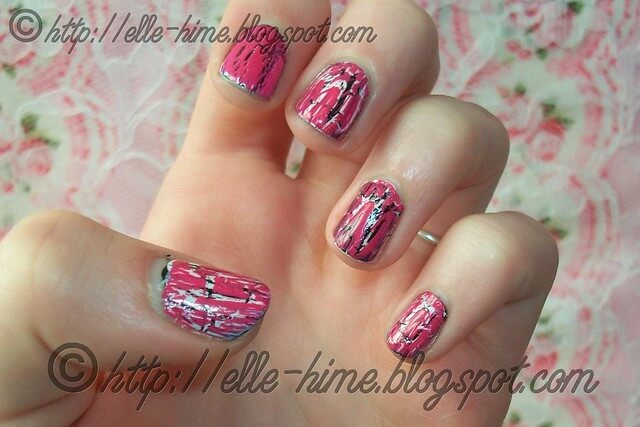
The result is abstract, with chunks of black and white peeking through the pink shatter color. It reminds me of confetti, street art, and something like candy or sprinkles. One of my favorite parts is that with the addition of white it hides tip wear wonderfully! In my photos my nails have been through a full workday.
Now for what you don’t want to do. I followed all the steps listed above except for on one nail, that is. I had a strong hunch that going directly over one crackle color with another would not product the effect I wanted. I was correct. Observe my left index finger’s nail:

It’s a dud. The pink shatter broke up exactly the way the previous coat of white had. I didn’t even bother to top coat the little guy! I didn’t correct it for photos because I wanted to show what happens when you don’t put a clearcoat between your crackle colors. So long as you get a top coat in between them they’ll do great and all the breaks will be random, layering over each other wonderfully. However it’s nice to know that if a crackle color isn’t showing up well over your base color you can just wait for it to dry, and then do another coat of crackle to strengthen it!
I’ll definitely experiment with this sort of look more, and be doing it again in more colors. In the future I would probably skip the whole “make the ring finger a bit different” thing and just do every other nail in the alternating base colors. Also, I’m curious about how the metallic crackle polishes will perform doing this!
Other creative ideas:
♥ Use just two crackle colors and do the first layer alternating every other nail with each color. Then, do the next (final) layer alternating crackle colors the other way.Remember, if you try this yourself you should share the results! Leave me a link below. =)
♥ Try a matte top coat, or even a glitter top coat.
♥ Base colors and crackle colors don’t have to match, try something with more contrast, such as a high glitter or foil base color.
♥ Don’t include all of the colors you picked on every nail.


thanks for the suggestion! i'll definitely give it a try!.
Replyi love you idea of mixing few Crackle polishes... looks fresh... i need to try to mix mine, have all the colors you show here))) thanks for idea!
ReplyYou're very welcome! Glad I could be inspirational. =D
Reply